Does the phrase “I’m hungry” send a shiver down your spine? I get it. You just finished cleaning up from dinner, and suddenly, someone needs a snack. Or maybe you’re staring at the clock, realizing you need a quick dessert for a playdate in 20 minutes. If you’re looking for more mess-free toddler snacks, you have to try our Peanut Butter & Jelly Oat Cups.
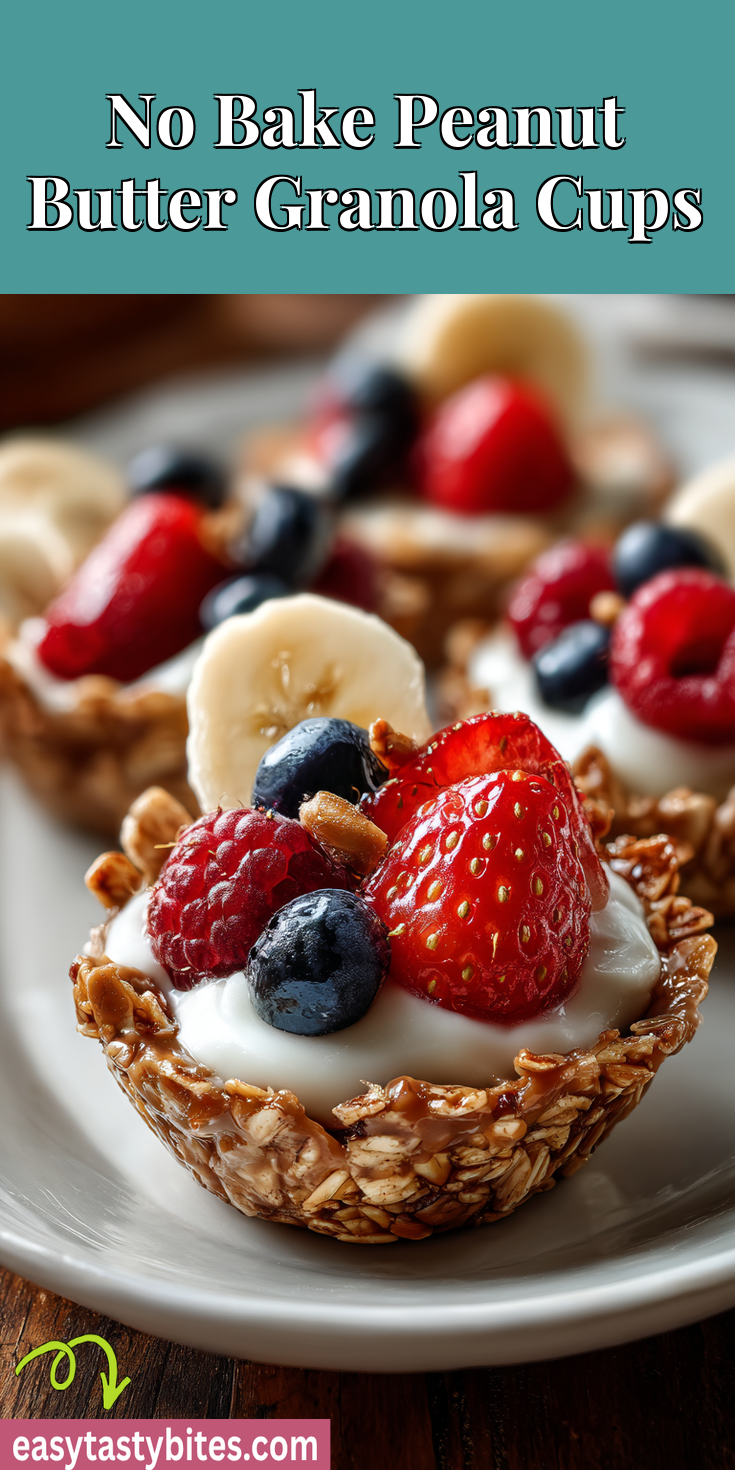
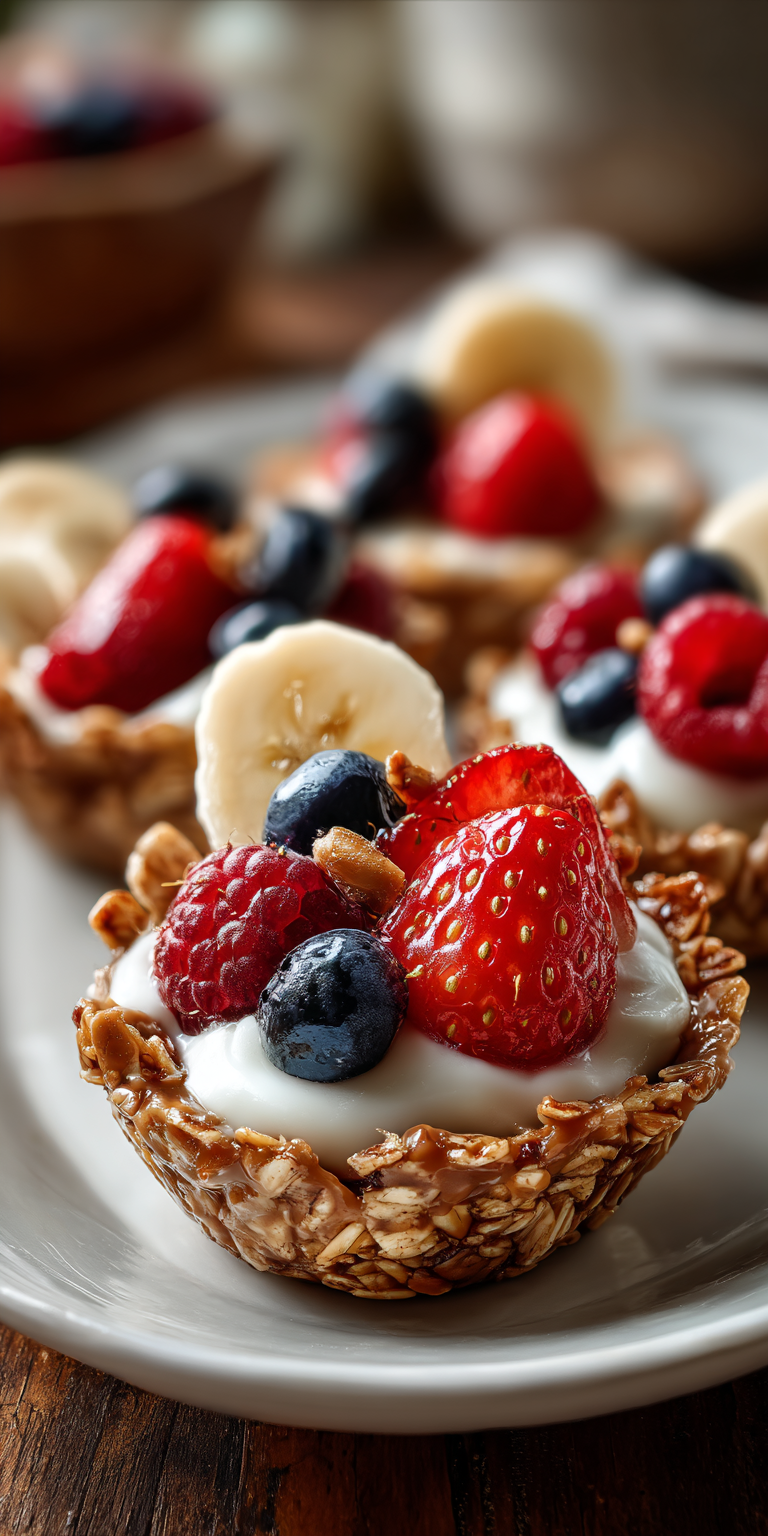
I’ve been there more times than I can count. That’s why our family is completely obsessed with No Bake Peanut Butter Granola Cups. They are the ultimate quick dessert that feels like a treat but is secretly packed with good stuff. No oven, no fuss, and most importantly, no complaints from the picky eater crew.
Think of them as the superhero of snacks. They come together in minutes, they’re fun to make with little hands, and they solve the “hangry” crisis before it even starts. Let me show you how this easy dessert became our secret weapon.
Recipe Overview
- Cuisine: American
- Category: Snack / Dessert
- Prep Time: 15 minutes
- Cook Time: 0 minutes
- Total Time: 15 minutes (plus 30 min to chill)
- Servings: Makes 12 cups
Why Even My Picky Eaters Love This!
My kids are the masters of the side-eye when a new food appears. But these cups? They pass every test. First, they’re handheld and fun to eat—no forks required! Second, they’re sweetened just right with honey and chocolate, so they feel like a real dessert.
Most importantly, the texture is a winner. There’s no weird mush or surprise chunks. It’s just crunchy, peanut buttery, and chocolatey goodness. It’s a snack they ask for by name, and that, my friends, is a parenting win.
Our Family-Friendly Ingredient List
I promise, this is not a fancy grocery list. You probably have most of this in your pantry right now. The goal is simple, real food that you can feel good about.
- 2 cups old-fashioned rolled oats (use gluten-free if needed)
- 1/2 cup creamy peanut butter
- 1/3 cup honey or pure maple syrup
- 1/4 cup melted coconut oil (or unsalted butter)
- 1 teaspoon pure vanilla extract
- A pinch of salt
- 1/2 cup mini chocolate chips (plus more for topping)
How to Get the Kids Involved in Cooking This
This is the best part! Getting them involved makes them so much more excited to try the final product. My little ones love to feel like kitchen helpers. If your crew loves the chocolate-peanut butter combo here, they’ll go crazy for our Chunky Monkey Banana Bites too.
For little hands (ages 3+): They can be in charge of pouring the oats and chocolate chips into the big bowl. They can also help press the mixture into the muffin tin cups—it’s like edible playdough!
For bigger kids (ages 6+): They can help measure all the ingredients and stir the big bowl of mixture. Supervise them with the microwave for melting, but let them do the stirring to combine everything.
No Bake Peanut Butter Granola Cups Recipe
Our Family-Friendly Ingredient List
The Full Step-by-Step Instructions
Notes
Enjoy your homemade No Bake Peanut Butter Granola Cups Recipe!
Nutrition Information
The Full Step-by-Step Instructions
Don’t let the steps fool you—this is incredibly simple. I’ll walk you through it so you can’t go wrong.
- Grab a standard 12-cup muffin tin. Line it with paper or silicone liners. This makes cleanup a dream.
- In a large mixing bowl, combine the rolled oats and the mini chocolate chips. Give it a quick stir.
- In a medium, microwave-safe bowl, combine the peanut butter, honey, and coconut oil. Heat it in the microwave for 30-second bursts, stirring in between, until it’s smooth and easy to stir.
- Stir the vanilla extract and pinch of salt into the warm peanut butter mixture until it’s all combined.
- Pour the warm, wet mixture over the dry oat and chip mixture. Stir everything together until every single oat is coated and shiny. It will seem a bit loose, but that’s perfect!
- Scoop the mixture evenly into the 12 prepared muffin cups. Use the back of a spoon or your fingers to press it down firmly into the cup shape.
- If you like, sprinkle a few extra chocolate chips on top of each cup and gently press them in so they stick.
- Pop the whole muffin tin into the refrigerator for at least 30 minutes to let them set and become firm. That’s it!
Fun Twists for Different Tastes
Got a kid who doesn’t like chocolate? Or maybe you want to mix it up? Here are our family’s favorite ways to change the recipe.
The “Trail Mix” Twist: Swap the chocolate chips for a mix of raisins and sunflower seeds. It gives a fun, different texture.
The “Double Chocolate” Twist: Add 2 tablespoons of cocoa powder to the dry oats. It’s for my true chocolate lovers!
The “SunButter” Twist: For nut-free classrooms or allergies, use sunflower seed butter instead of peanut butter. It works just as well and tastes amazing.
The “Grown-Up” Twist: After pressing the mixture into the cups, add a tiny sprinkle of flaky sea salt on top. It makes the sweet and salty flavor pop!
Storing & Reheating (Perfect for Busy Nights)
This is why I make a double batch every time. They are the perfect grab-and-go snack for lunch boxes or after-school hunger.
Keep them stored in a sealed container in the refrigerator. They will stay perfect for up to a week. You can also freeze them for up to 3 months! Just let one thaw for 10 minutes before eating, or pop it straight into a lunch box—it will be thawed by snack time.
Nutrition Notes
I’m not a dietitian, but as a mom, I like to know what’s going into our food. Here’s the simple breakdown of what’s in these tasty cups.
- Energy Boost: Oats and peanut butter provide protein and fiber to keep bellies full and energy steady.
- Healthy Fats: The peanut butter and coconut oil have good fats that are important for growing brains.
- Natural Sweetness: We use honey or maple syrup instead of refined sugar. It’s still a treat, but a slightly better one!
- Allergen Note: This recipe can easily be made nut-free with sunflower seed butter and gluten-free with certified GF oats.
FREQUENTLY ASKED QUESTIONS
Can I use quick oats instead of old-fashioned rolled oats?
You can, but the texture will be a bit softer and less chewy. Old-fashioned oats give the best crunch and hold their shape better. If you only have quick oats, the recipe will still work, just know they’ll be a little different.
My mixture seems too dry and isn’t sticking together. What did I do wrong?
No worries! This usually means your peanut butter mixture needed to be a touch warmer or you need a bit more “glue.” Simply warm up another tablespoon of peanut butter with a teaspoon of honey, mix it in, and it should come together perfectly.
Are these like those store-bought granola bars?
They’re even better! You control the ingredients, so there are no weird preservatives or extra sugars. They taste fresher, and you can customize them exactly how your family likes them. It’s a homemade upgrade.
So there you have it. Our go-to solution for snack emergencies, playdate treats, and lunchbox surprises. It’s the recipe that finally got everyone at my table to agree. For another fantastic frozen treat that’s perfect for hot days, check out our easy Frozen Yogurt Granola Cups.
I truly hope these little cups bring as much peace (and deliciousness) to your kitchen as they have to mine. They prove that sometimes, the simplest ideas are the very best ones.
I’d love to know if this was a hit with your family! Did your kids love pressing the mixture into the cups? Did you try a fun twist? Please leave a comment and rating below!