
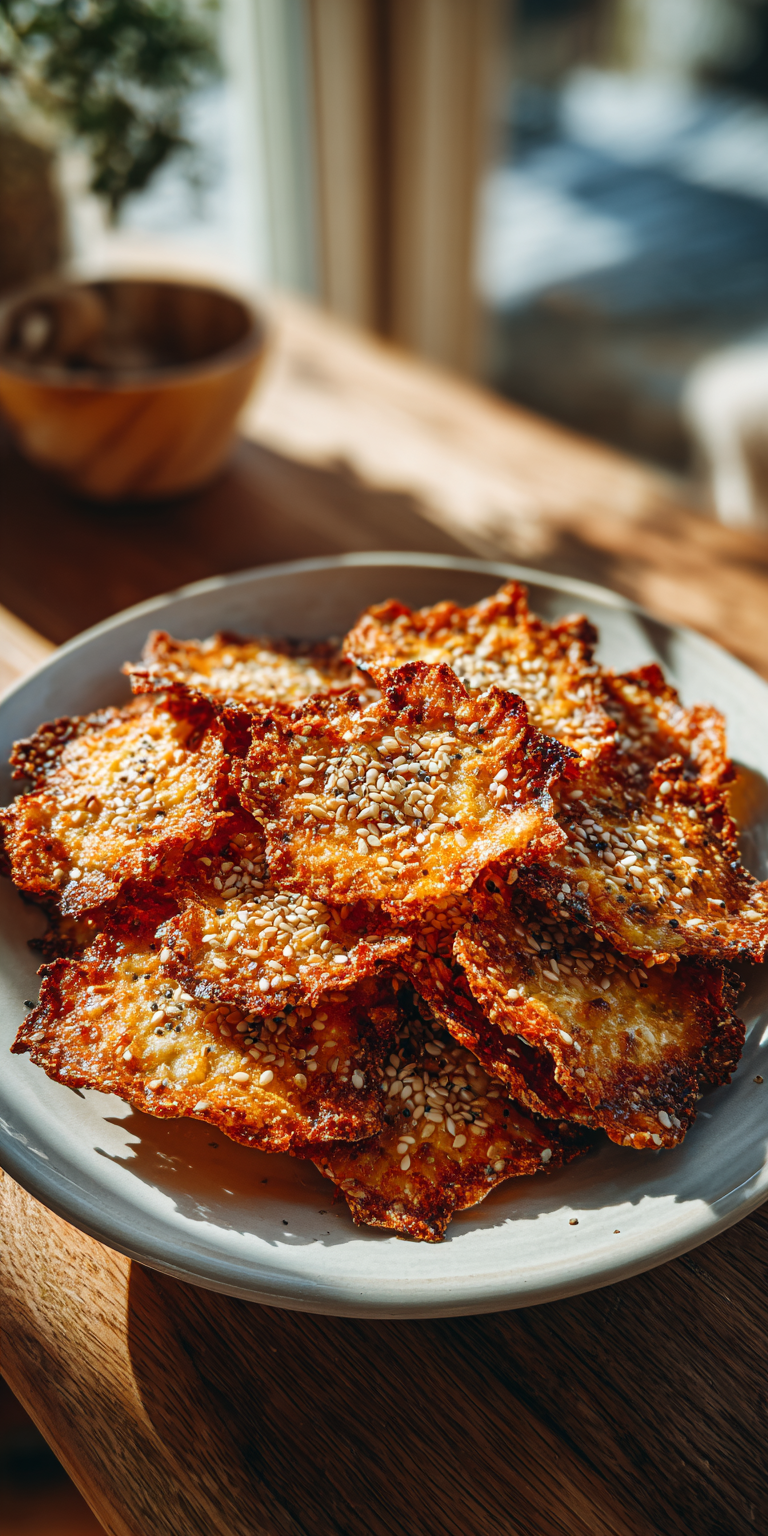
Some recipes just feel like a warm hug. For me, that’s Keto Everything Bagel Cheese Chips. They have that perfect, nostalgic crunch and savory flavor that takes me right back to weekend mornings at my grandma’s house. If you’re looking for another fantastic high-protein, crispy snack, you should try these Crispy Cottage Cheese Chips.
The smell of toasting bagels and coffee used to fill her kitchen. I wanted to capture that same cozy feeling in a snack that fits a low-carb life. These cheesy crisps are my answer.
They are everything you love about an everything bagel, but in a light, crispy, cheesy form. It’s a classic comfort food, made new again. Let’s dig into how you can make this simple, wonderful treat.
Recipe Overview
- Cuisine: American
- Category: Snack / Appetizer
- Prep Time: 10 minutes
- Cook Time: 15 minutes
- Total Time: 25 minutes
- Servings: 4
The Story Behind This Classic Recipe
This recipe started with a serious craving. I missed the ritual of slicing a fresh everything bagel, slathering it with cream cheese, and savoring each bite.
On a keto diet, that wasn’t really an option. But the memory of those flavors wouldn’t leave me alone. I remembered how my grandma would make little cheese crisps in her oven as a quick treat for us kids.
I thought, what if I combined those two ideas? The result was this magic. It’s a blend of her simple kitchen wisdom and my own need for a comforting, crunchy snack. It feels like a little piece of home.
What Makes This the *Traditional* Way
For me, the traditional way is all about keeping it simple and real. We’re not using any strange binders or complicated methods here.
The base is just good, shredded cheese. The everything bagel seasoning is the classic blend you know and love: sesame seeds, poppy seeds, garlic, onion, and salt. That’s it.
We let the oven do the work, slowly melting the cheese into a perfect, lacy crisp. This method is timeless. It relies on quality ingredients and patience, not tricks.
Keto Everything Bagel Cheese Chips Recipe
The Classic Ingredients (No Fancy Stuff!)
How to Make It Just Like Grandma Did
Notes
Enjoy your homemade Keto Everything Bagel Cheese Chips Recipe!
Nutrition Information
The Classic Ingredients (No Fancy Stuff!)
Gathering these ingredients is so easy. You probably have most of them in your kitchen right now. Here’s what you’ll need.
- 2 cups (8 oz) finely shredded cheddar cheese (pre-shredded works, but block cheese melts better)
- 2 tablespoons everything bagel seasoning
- 1/4 teaspoon garlic powder (optional, for extra punch)
How to Make It Just Like Grandma Did
The process is wonderfully straightforward. Just follow these steps and you’ll have a bowl of crispy, cheesy goodness in no time. Let’s get started.
- First, heat your oven to 350°F (175°C). Line a large baking sheet with parchment paper. This is very important to prevent sticking and make cleanup a breeze.
- In a medium bowl, mix the shredded cheese with the everything bagel seasoning and garlic powder, if you’re using it. Make sure the seasoning is evenly distributed throughout the cheese.
- Take small spoonfuls of the cheese mixture and place them on the prepared baking sheet. You want about a tablespoon per chip. Leave at least 2 inches between each pile—they will spread a lot as they melt.
- Gently flatten each pile just a bit with the back of your spoon. This helps them form a more even crisp.
- Bake for 12-15 minutes. Watch for the edges to turn a deep golden brown and the centers to look bubbly and set. They will still be soft when hot.
- Take the baking sheet out of the oven. Let the chips cool completely on the sheet. They will crisp up as they cool. Be patient here—this is when the magic happens!
- Once completely cool and crisp, gently peel them off the parchment paper. Serve immediately or store for later.
My Tips for Perfecting This Classic
After making these dozens of times, I’ve learned a few things that make them perfect every single time. Here are my best tips for you.
First, use a block of cheese and shred it yourself. Pre-shredded cheese has anti-caking agents that can sometimes keep it from melting into a perfectly smooth, lacy crisp. The extra minute of shredding is worth it.
Second, don’t rush the cooling. I know it’s tempting to try one right away. But if you try to move them while they’re warm, they’ll bend and won’t get that satisfying snap. Let them cool fully on the pan.
Finally, if your chips are chewy instead of crisp, they likely needed another minute or two in the oven. The edges should be a definite golden brown. Ovens vary, so your first batch is a learning one! For a different technique that also yields a fantastic crunch, check out this detailed Crispy Cottage Cheese Chips recipe.
How to Store and Enjoy Later
These chips are best enjoyed the day you make them, when they’re at their peak crispness. But if you have leftovers, I have a good method for you.
Let them cool completely, then transfer them to an airtight container. Place a paper towel at the bottom and top of the container to absorb any moisture. They should stay crisp for 2-3 days stored at room temperature.
You can enjoy them plain, of course. But they’re also fantastic with a dollop of full-fat cream cheese or as a dipper for a keto-friendly onion dip. They make any snack time feel special.
Nutrition Notes
Since this is a keto recipe, many of you are watching your macros. Here’s a general idea of what you’re getting in this classic snack. Remember, values can change based on the exact cheese and seasoning you use.
- Serving Size: Approximately 1/4 of the recipe
- Calories: ~220
- Total Fat: 18g
- Protein: 14g
- Total Carbohydrates: 2g
- Dietary Fiber: 0.5g
- Net Carbs: ~1.5g
Your Questions About This Classic Recipe
I get a few questions about this recipe all the time. Here are the answers to the most common ones, to help you make sure yours turn out just right.
Can I use a different type of cheese?
Absolutely! While cheddar gives a classic flavor and great color, other hard, dry cheeses work well too. I’ve had great success with a Monterey Jack and Parmesan blend. Just avoid soft, moist cheeses like fresh mozzarella.
My chips stuck to the parchment. What happened?
This usually means they needed to bake a little longer. The cheese should be fully set and golden at the edges before you take it out. Also, make sure you’re using parchment paper, not wax paper. Wax paper can melt in the oven.
Can I make these in the air fryer?
You can! The method is very similar. Place small piles on parchment in your air fryer basket, leaving space. Cook at 320°F for about 5-7 minutes, until golden and bubbly. Let them cool completely in the basket—they’ll crisp up as they cool.
I hope this recipe brings a little bit of that warm, comforting kitchen feeling into your home. It’s a simple joy, but sometimes those are the very best ones. If you enjoyed this cheesy snack, exploring other protein-packed options like the Cottage Cheese Chips recipe could be your next kitchen adventure.
Making these cheesy crisps always makes my kitchen smell like happy memories. I love knowing that you might be creating your own new traditions with this same, simple dish.
If you give this classic a try, I would love to hear about it. Did your family love them? Do you have a special way you like to serve them? Let me know your thoughts and your own memories in the comments below!