
Some recipes just feel like a warm hug. For me, these No Bake Keto Peanut Butter Cups are one of them. They take me right back to my grandma’s kitchen, where the smell of melting chocolate and peanut butter was pure happiness. If you’re looking for more fun, mess-free peanut butter snacks, you’re in the right place.
We didn’t call them “fat bombs” or “keto” back then. They were just a special, simple treat. A little cup of joy made with love and a few good ingredients. That’s the spirit I want to share with you today.
This version keeps all that cozy, nostalgic flavor. It just fits a low-carb way of eating. So we can enjoy that classic taste, guilt-free. Let’s make some magic together.
Recipe Overview
- Cuisine: American
- Category: Dessert
- Prep Time: 15 minutes
- Cook Time: 0 minutes
- Total Time: 15 minutes + chilling
- Servings: 12 cups
The Story Behind This Classic Recipe
I can still see my grandma’s hands, steady and sure, spooning the peanut butter filling. She always used a special little tin tray with twelve cups. To me, it was a treasure mold.
She made these for every birthday, holiday, or just a rainy Tuesday. The ritual was as comforting as the treat itself. Melting the chocolate over a double boiler, the gentle stirring, the careful layering.
It was my first real “job” in the kitchen. I got to sprinkle the last few chocolate chips on top before they set. That memory is baked into my heart, just as these cups are baked into my family’s story.
What Makes This the *Traditional* Way
The traditional way is all about simplicity and balance. It’s not about fancy techniques or hard-to-find items. It’s about honoring the two great flavors at its core.
First, we use real, natural peanut butter. The kind that separates, with just peanuts and salt. That oily, rich texture is non-negotiable for the right feel. This same principle of simple, wholesome ingredients makes our no-bake Chunky Monkey Banana Bites such a hit.
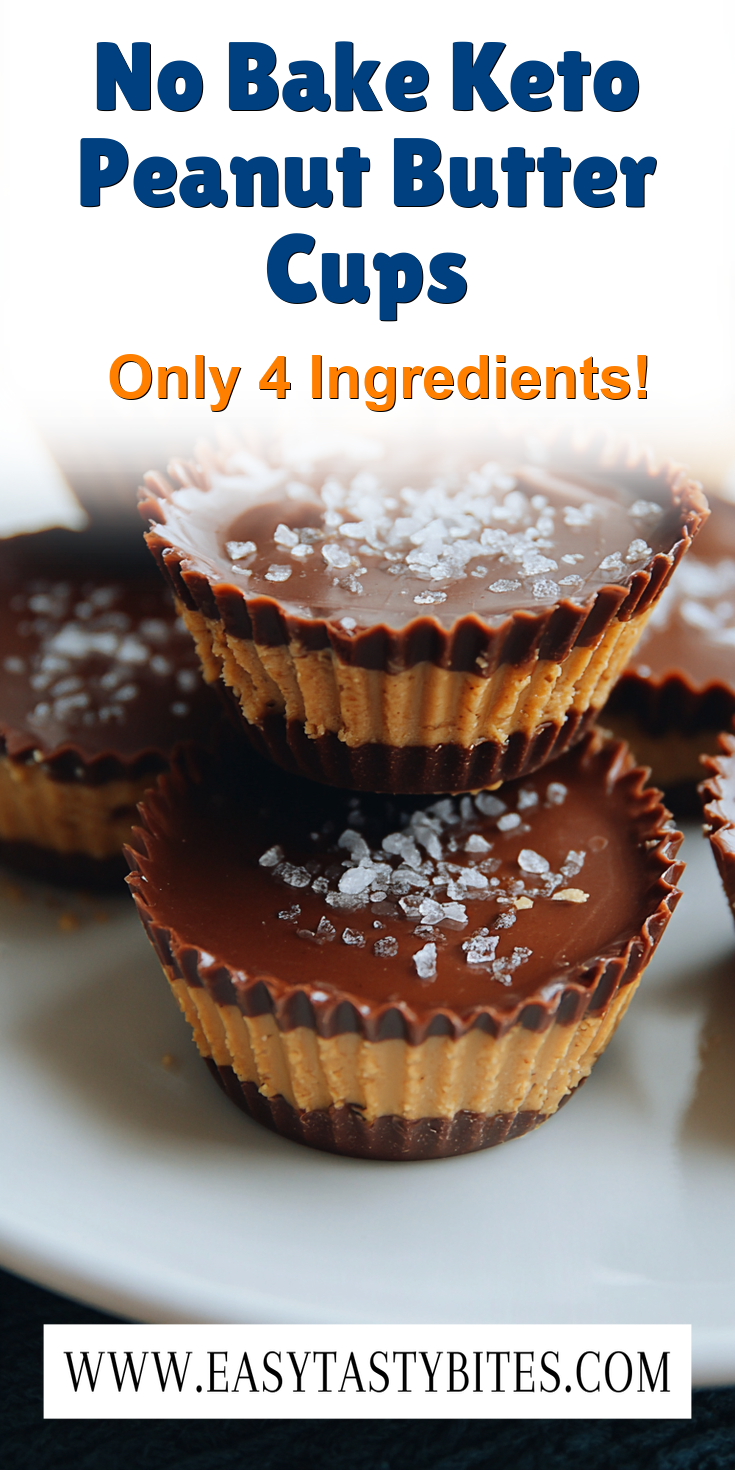
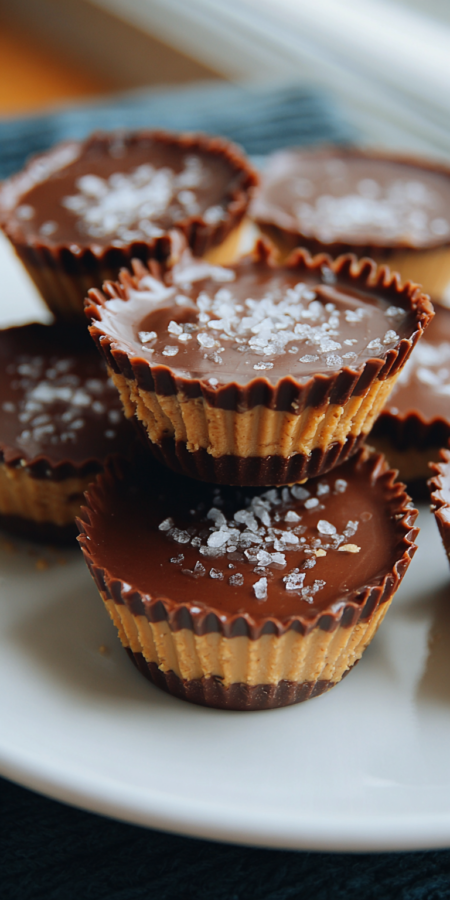
Second, we build in layers. A base of chocolate, a pillow of peanut butter, then a sealing cap of more chocolate. This creates the perfect bite every single time. It’s a method that has stood the test of time for a very good reason.
No Bake Keto Peanut Butter Cups Recipe
The Classic Ingredients (No Fancy Stuff!)
How to Make It Just Like Grandma Did
Notes
Enjoy your homemade No Bake Keto Peanut Butter Cups Recipe!
Nutrition Information
The Classic Ingredients (No Fancy Stuff!)
Grandma believed in a short, honest ingredient list. So do I. Here’s everything you’ll need to make this comfort food just right.
- 1 cup sugar-free chocolate chips
- 1/4 cup coconut oil, divided
- 1 cup natural, creamy peanut butter (no added sugar)
- 1/4 cup powdered erythritol (or your favorite keto sweetener)
- 1 teaspoon pure vanilla extract
- A pinch of fine sea salt
How to Make It Just Like Grandma Did
Making these is a peaceful, almost meditative process. Don’t rush it. Enjoy each step, just like she taught me.
- Line a 12-cup muffin tin with paper or silicone liners. This makes cleanup a breeze.
- In a heat-safe bowl, combine the chocolate chips and 2 tablespoons of the coconut oil. Melt gently in the microwave in 30-second bursts, stirring well between each, until smooth.
- Spoon about 1 teaspoon of the melted chocolate into the bottom of each liner. Use the back of the spoon to spread it up the sides a little. Pop the tray in the freezer for 10 minutes to set.
- While the base sets, make the filling. In a medium bowl, stir together the peanut butter, remaining 2 tablespoons of coconut oil, powdered erythritol, vanilla, and salt. Mix until it’s completely smooth and creamy.
- Take the tray from the freezer. Divide the peanut butter filling evenly among the cups, pressing it down gently over the chocolate base.
- If the remaining chocolate has thickened, give it a quick re-warm. Then, spoon it over the top of each peanut butter layer, sealing the edges.
- Chill the entire tray in the refrigerator for at least 1 hour, or until the cups are completely firm. Then, they’re ready to enjoy!
My Tips for Perfecting This Classic
A couple of small tricks can make a big difference. They help you get that perfect, nostalgic result we all love.
First, make sure your peanut butter is well-stirred and at room temperature. This is key for a smooth filling that’s easy to work with. A lumpy, cold filling is hard to spread.
Second, don’t skip the freezer step for the chocolate base. It creates a firm barrier so the peanut butter and chocolate layers stay distinct. This gives you that wonderful contrast in every single bite.
How to Store and Enjoy Later
These little cups keep beautifully. Store them in a single layer in an airtight container in the refrigerator. They’ll stay perfect for up to two weeks.
You can also freeze them for longer storage. Just layer them between parchment paper in a freezer-safe container. They’ll keep for up to 3 months.
Let a frozen cup sit at room temperature for 5-10 minutes before eating. This softens it just enough for the full, creamy flavor to shine through.
Nutrition Notes
This is a treat, but it’s made with good, simple ingredients. Here’s a rough idea of what’s in each cup.
- Calories: ~180
- Fat: 16g
- Net Carbs: 3g
- Protein: 5g
Your Questions About This Classic Recipe
Here are answers to a few common questions I get about this family favorite.
Can I use a different nut butter?
Absolutely. Almond butter works wonderfully for a different twist. Just make sure it’s the natural, creamy kind with no added sugars for the best texture and taste.
My chocolate is seizing or getting lumpy. What did I do wrong?
This usually means a tiny bit of water got into the chocolate. Always make sure your bowls and spoons are completely dry. If it happens, try stirring in a tiny bit more coconut oil to smooth it back out.
Why use powdered erythritol instead of granulated?
The powdered version dissolves completely into the peanut butter filling. Granulated sweetener can stay a little gritty. Powdering it gives you that silky-smooth texture we all remember from the original treat.
I hope this recipe brings a little bit of that old-fashioned kitchen warmth into your home. There’s something so special about making a treat with your own hands, especially one tied to such sweet memories. For another baked good that combines peanut butter and banana into a perfect toddler-approved healthy bite, be sure to try our muffins.
These cups are proof that comfort food can be simple, wholesome, and still feel like a celebration. I make them now for my own family, and the tradition feels just as rich and rewarding.
Did this recipe spark a memory for you? I would love to hear your stories. Please let me know how your peanut butter cups turned out in the comments below, and don’t forget to leave a rating!

 Tired of the 5 PM dinner panic? Grab my new 30-Minute Cookbook!