Ever feel like you’re running a restaurant with the world’s toughest critics? I know I do. Getting a “yum” instead of a “yuck” can feel like a major win in my house.

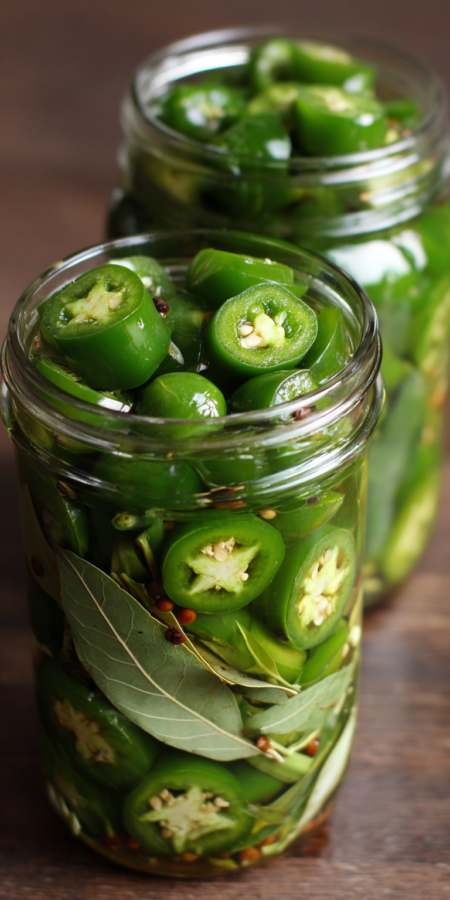
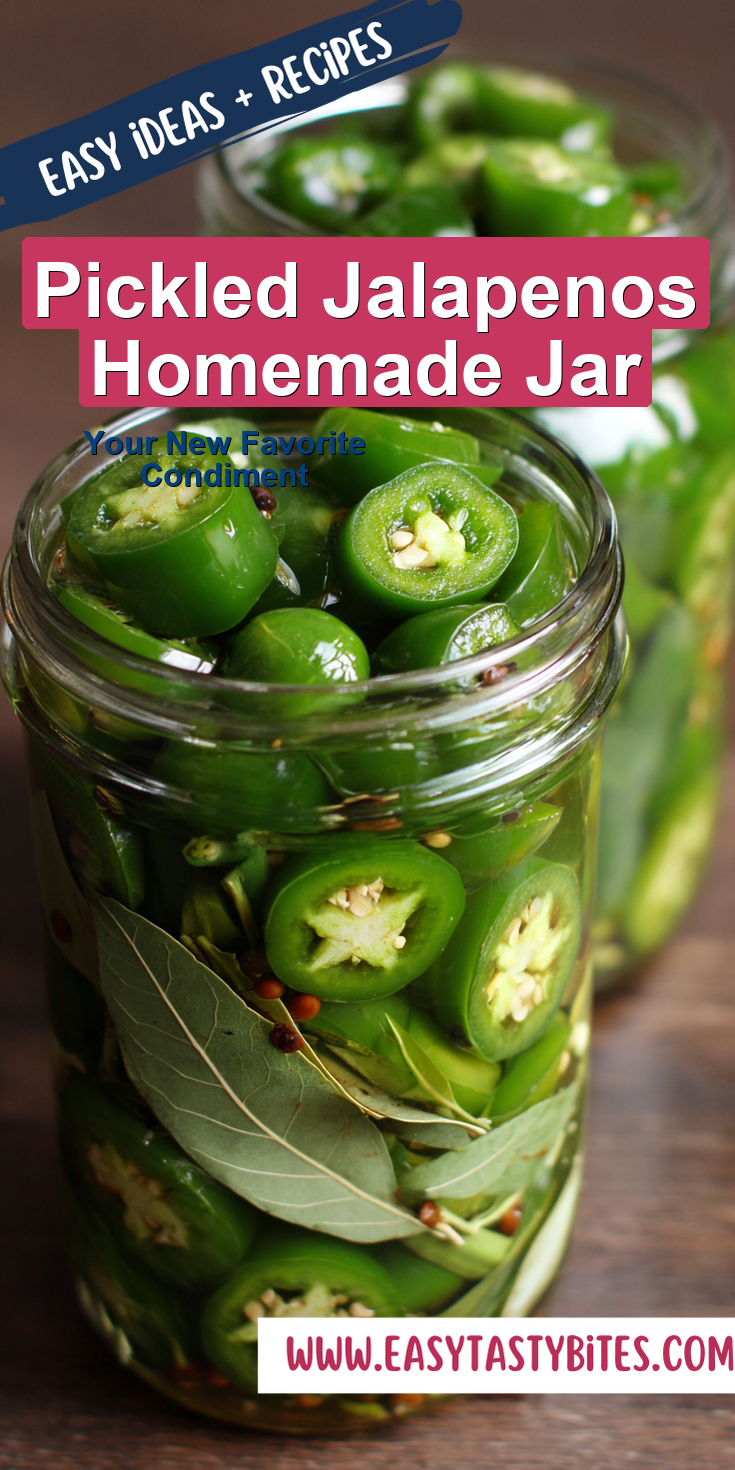
That’s why I’m so excited to share our recipe for a Pickled Jalapenos Homemade Jar. It’s not just a spicy condiment. It’s a secret weapon for turning boring meals into something special that even my picky crew gets excited about.
Think beyond the heat. These tangy, crunchy peppers are a magic trick for burgers, tacos, and more. Let’s turn that garden harvest into a family favorite.
Recipe Overview
- Cuisine: American/Mexican-Inspired
- Category: Canning Recipes / Condiment
- Prep Time: 15 minutes
- Cook Time: 5 minutes
- Total Time: 20 minutes (plus cooling)
- Servings: Makes about 2 pint jars
Why Even My Picky Eaters Love This!
I get it. “Spicy” can be a scary word for kids. But here’s the magic of pickling. The vinegar and sugar in the brine tame the heat and add a fun, sour punch that kids often love (think pickles!).
It gives them control. They can add one tiny slice to their taco or a big pile on their hot dog. That power to choose makes all the difference. Plus, the bright green color is just fun!
Our Family-Friendly Ingredient List
Nothing fancy here! These are pantry staples you probably already have. Simple is best when you’re cooking with a busy family in mind.
- 1 pound fresh jalapeño peppers
- 2 cups white vinegar
- 2 cups water
- 2 tablespoons granulated sugar
- 2 tablespoons kosher or pickling salt
- 4 cloves garlic, peeled and smashed
- 1 teaspoon whole black peppercorns
- 1 teaspoon mustard seeds (optional, but nice)
How to Get the Kids Involved in Cooking This
My kids are always more likely to try something they helped make. This recipe has perfect, safe jobs for little hands.
They can be in charge of washing the peppers. Older kids can use a butter knife (with close supervision!) to slice off the pepper stems after I’ve cut them in half. Their most important job? Pushing the garlic cloves into the jar. It’s satisfying and fun.
The Full Step-by-Step Instructions
Don’t let the canning part scare you. This is a simple “quick pickle” method that doesn’t need special equipment. We’re just making fridge pickles that last for weeks.
Pickled Jalapenos Homemade Jar Recipe
Our Family-Friendly Ingredient List
The Full Step-by-Step Instructions
Notes
Enjoy your homemade Pickled Jalapenos Homemade Jar Recipe!
Nutrition Information
- Wash your jalapeños and jars thoroughly with hot, soapy water.
- Slice the jalapeños into uniform ¼-inch rounds. For milder pickles, scrape out the seeds and white ribs with a spoon. For more heat, leave them in!
- Pack the jalapeño slices, garlic cloves, peppercorns, and mustard seeds tightly into your clean jars.
- In a medium saucepan, combine the vinegar, water, sugar, and salt. Bring it to a boil over medium-high heat, stirring until the sugar and salt dissolve.
- Carefully pour the hot brine over the peppers in the jars, leaving about ½ inch of space at the top.
- Tap the jars gently on the counter to remove any air bubbles. Screw on the lids and let the jars cool to room temperature.
- Once cool, pop them in the fridge. The flavor gets better every day! Wait at least 24 hours before tasting for the best result.
Fun Twists for Different Tastes
This recipe is a fantastic base. You can tweak it to please everyone at your table. Here are our family’s favorite spins.
For sensitive palates, add a sliced carrot or two to the jar. It soaks up the flavor and gives a sweet, crunchy option. For my husband and me, I sometimes add a slice of raw onion or a pinch of red pepper flakes to one jar for an extra kick. It’s a great burger topping for grown-up nights!
Storing & Reheating (Perfect for Busy Nights)
These pickled jalapeños live in the fridge. They’ll keep beautifully for at least 2 months. There’s no need to reheat them at all! They’re a cold, ready-to-go sandwich fixing or taco night helper.
Just pull the jar out, grab a fork, and add a punch of flavor to anything on the plate. They’re the ultimate quick meal booster.
Nutrition Notes
- Low in calories and fat.
- Provides a small amount of Vitamin C.
- Contains probiotics from the fermentation process, which are great for gut health.
- Remember, the sodium content comes mainly from the brine, which isn’t fully consumed.
FREQUENTLY ASKED QUESTIONS
How long until they are ready to eat?
You can taste them after a few hours, but for the best, most balanced flavor, I really recommend waiting a full 24 hours. The patience is worth it!
Do I have to can them for shelf storage?
No! This is a refrigerator pickle recipe. The vinegar brine and cold fridge keep them perfectly safe and crunchy for weeks. It’s the easiest way to start.
My kids are worried about the spice. Any tips?
Absolutely. First, make sure you remove all the seeds and white membranes—that’s where most of the heat lives. Second, remind them they can start with just one piece on the side of their plate. It’s all about fun, not fire!
I hope this recipe brings a little zing and a lot less stress to your family table. It’s a project that pays off for weeks in delicious, crunchy bites.
Turning our garden harvest or grocery haul into something we all enjoy is my favorite kind of kitchen win. It makes those weeknight meals feel a bit more special.
I’d love to know if this was a hit with your family! Did your kids get brave and try a pepper? Please leave a comment and rating below!