You want a show-stopping dessert. The kind that makes people think you spent all day in a fancy kitchen.
But it’s a Wednesday. Or you have a last-minute date night. Who has time for that?
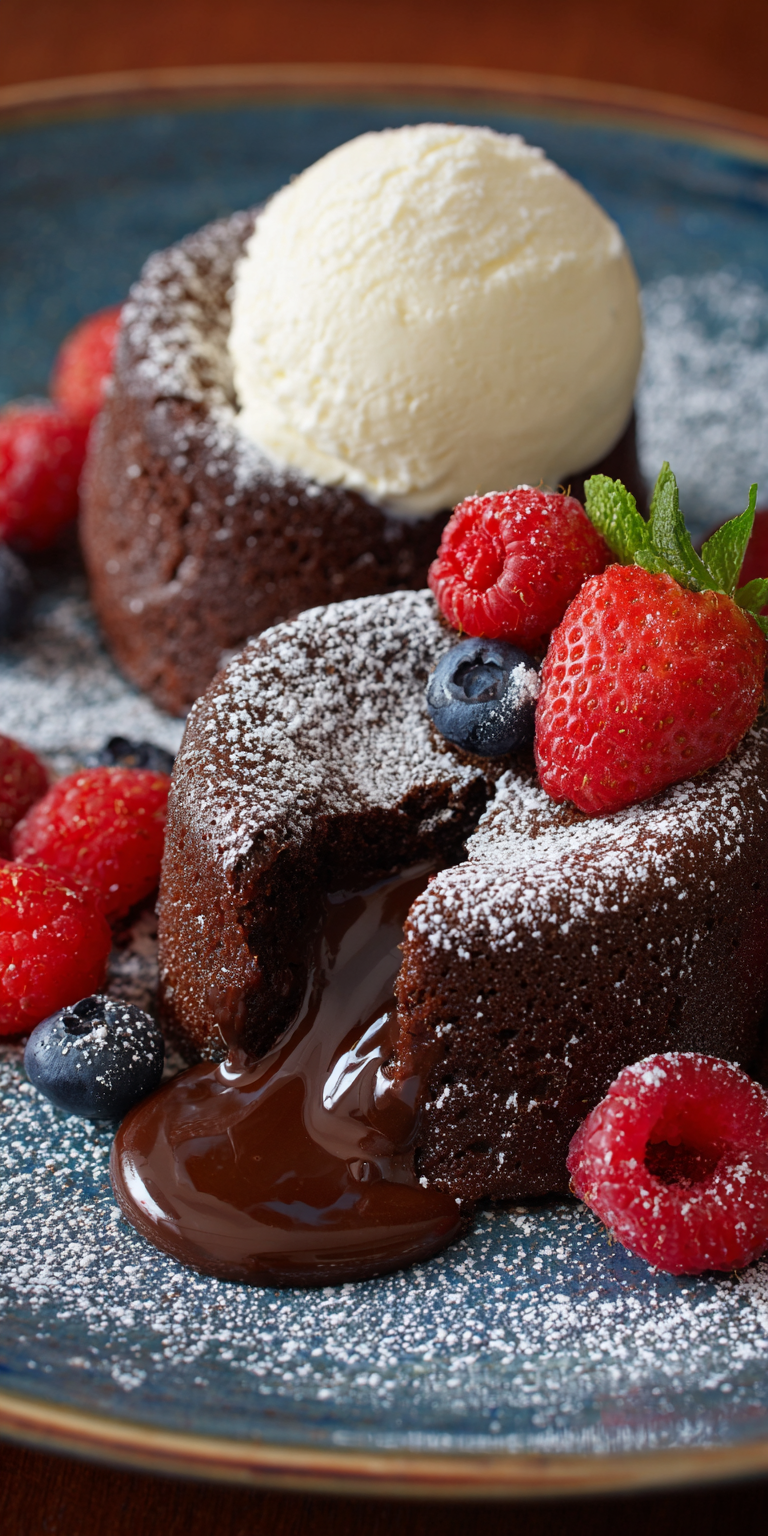
You do. Right now. This Chocolate Lava Cake Plated Dessert is your secret weapon. It looks gourmet, tastes incredible, and is shockingly simple. We’re talking under 30 minutes from bowl to molten chocolate glory. If you love a rich chocolate fix but want something a bit lighter, you might also enjoy this easy high-protein chocolate pudding for a no-bake option.
I make this all the time. It never fails to impress. Let’s get that warm, gooey center flowing.
Recipe Overview
- Cuisine: French-Inspired
- Category: Dessert
- Prep Time: 10 minutes
- Cook Time: 12-14 minutes
- Total Time: 25 minutes
- Servings: 2 (Perfect for baking for two!)
Ultimate Guide to Chocolate Lava Cake Plated Dessert
This is the only guide you need. Why? Because I cut out all the fuss.
Most recipes make you nervous. They talk about precise temperatures and tricky timing. Not here.
We use a simple method that works every single time. The flavor is deep, rich, and intensely chocolatey.
The texture is magic. A delicate cake shell gives way to a river of warm molten chocolate sauce.
It’s the ultimate valentine dessert. Or a Tuesday treat. You deserve it.
The Simple Ingredients
Check your pantry. You probably have most of this already. That’s the beauty of it.
Chocolate Lava Cake Plated Dessert Recipe
The Simple Ingredients
Let’s Get Cooking! (The Step-by-Step)
Notes
Enjoy your homemade Chocolate Lava Cake Plated Dessert Recipe!
Nutrition Information
- 4 ounces high-quality semi-sweet chocolate (bars or chips)
- 4 tablespoons unsalted butter (plus extra for greasing)
- 1/4 cup powdered sugar
- 1 large egg
- 1 large egg yolk
- 1/2 teaspoon vanilla extract
- Pinch of salt
- 2 tablespoons all-purpose flour
- Cocoa powder or flour for dusting ramekins
Let’s Get Cooking! (The Step-by-Step)
Ready? This goes fast. Set out your ingredients first. It makes everything smoother.
- Prep your tools. Preheat your oven to 425°F (220°C). Grab two 6-ounce ramekins. Grease them well with butter. Dust the inside with cocoa powder or flour. Tap out the excess. This stops sticking.
- Melt chocolate and butter. Do this in a microwave-safe bowl. Heat in 30-second bursts, stirring in between. Stop when it’s just smooth. Let it cool for a minute.
- Mix the wet stuff. In another bowl, whisk the egg, egg yolk, powdered sugar, vanilla, and salt. Whisk until it’s a bit pale and thick. This takes about 2 minutes.
- Combine. Slowly pour the slightly cooled chocolate into the egg mixture. Whisk as you pour. Keep whisking until it’s one gorgeous, shiny batter.
- Add flour. Sift the flour right into the bowl. Gently fold it in with a spatula. Just until no white streaks remain. Don’t over-mix!
- Bake. Divide the batter between your prepared ramekins. Place them on a baking sheet. Bake for 12-14 minutes. The tops will be set and cracked. The edges will pull away slightly. This is the key to the lava center!
- Serve immediately. Let cakes cool for exactly 1 minute. Run a knife around the edge. Place a small plate upside-down on top of a ramekin. Use an oven mitt, flip it over, and lift the ramekin off. Watch the magic. Repeat for the second cake.
What to Serve With This Dish
Plating is half the fun. It turns dessert into an event.
A simple scoop of vanilla ice cream is classic. The hot and cold combo is a must. For another cool, creamy chocolate dessert that’s packed with protein, try this indulgent high-protein chocolate pudding.
A few fresh raspberries or strawberries add a bright, tart pop. A dusting of powdered sugar looks beautiful.
A dollop of whipped cream and a mint sprig? Now you’re in a five-star restaurant. Your kitchen.
Make This Recipe Your Own (Quick Swaps)
Play with it! This recipe is a fantastic base.
Try dark chocolate for a more intense, less sweet bite. It’s my personal favorite.
Add a tiny pinch of espresso powder to the batter. It won’t taste like coffee. It just makes the chocolate flavor richer.
For a fun twist, drop a few fresh raspberries or a square of caramel into the center of the batter in the ramekin before baking.
How to Store Leftovers (If You Have Any!)
Let’s be real. Leftovers are rare. But if you must, act fast.
Once cooled completely, cover the ramekins tightly with plastic wrap. Keep them in the fridge for up to 2 days.
To reheat, remove the plastic. Microwave for 30-45 seconds. You might lose some lava effect, but it’ll still be delicious.
NUTRITION INFORMATION
- Calories: ~580
- Carbohydrates: 52g
- Protein: 8g
- Fat: 38g
- Saturated Fat: 22g
- Cholesterol: 245mg
- Sodium: 85mg
- Fiber: 3g
- Sugar: 38g
(Note: This is an estimate for one cake. Values can vary based on specific ingredients used.)
FREQUENTLY ASKED QUESTIONS
Can I make the batter ahead of time?
Yes! Prep the batter and pour it into the greased ramekins. Cover and refrigerate for up to 24 hours. Bake straight from the fridge, adding 1-2 extra minutes.
My lava cake didn’t have a runny center. What happened?
You likely over-baked it. Ovens vary. Start checking at 11 minutes. The center should still jiggle slightly when you shake the ramekin. It sets quickly out of the oven.
Can I use a muffin tin instead of ramekins?
You can, but be careful. Grease the cups very well. Baking time will be less, maybe 9-11 minutes. The flip-and-plate move is trickier, so you can serve them right in the tin.
See? Gourmet food doesn’t need hours. It needs a solid plan and a few great ingredients.
You just made a restaurant-worthy dessert in less time than it takes to watch a sitcom. That’s a major win. Whether you’re baking this lava cake or whipping up a quick no-bake high-protein chocolate pudding, you’ve got a delicious chocolate dessert ready in no time.
Go try this and win your weeknight (or date night!). Let me know how it goes by leaving a comment and rating below!