
You’ve pan-seared halibut before. You get a nice crust, a flaky interior. It’s good. But I bet it’s never been restaurant-perfect at home. There’s a tiny, often-overlooked step that bridges the gap between a simple white fish dinner and a show-stopping seafood dish. This technique-focused approach is perfect for a quick and satisfying weeknight meal.
Ready to find out what it is? This isn’t about a fancy ingredient. It’s about a fundamental kitchen principle most home cooks ignore. Mastering it will change your approach to all proteins, not just this pan-seared halibut.
Let’s get that halibut fillet out of the “healthy dinner” rut and onto the center of your table where it belongs. I’ll show you how.
Recipe Overview
This is your blueprint. Simple times, stunning results.
- Cuisine: Modern American
- Category: Main Course
- Prep Time: 10 minutes
- Cook Time: 15 minutes
- Total Time: 25 minutes
- Servings: 2
The Secret Ingredient That Makes All the Difference
It’s not in your spice rack. It’s on your counter. The secret is time. Specifically, the 10-15 minutes you let the halibut sit at room temperature before it touches the pan.
Cold fish straight from the fridge will shock in a hot pan. The outside overcooks before the center is done. Room-temp fish cooks evenly, from edge to edge. This simple patience is the single biggest upgrade you can make.
It ensures that beautiful, crisp sear and that moist, just-flaky interior happen in sync. Never skip this step.
Why This Method is Better (My Pro-Tips)
I don’t just pat my fish dry. I leave it uncovered on a rack in the fridge for 30 minutes if I can. This air-dries the surface even more.
A bone-dry surface is non-negotiable for the crust. My other tip? Don’t move it. Place the fillet in the hot oil and leave it alone. Let the pan do its work. You’ll know it’s ready to flip when it releases easily.
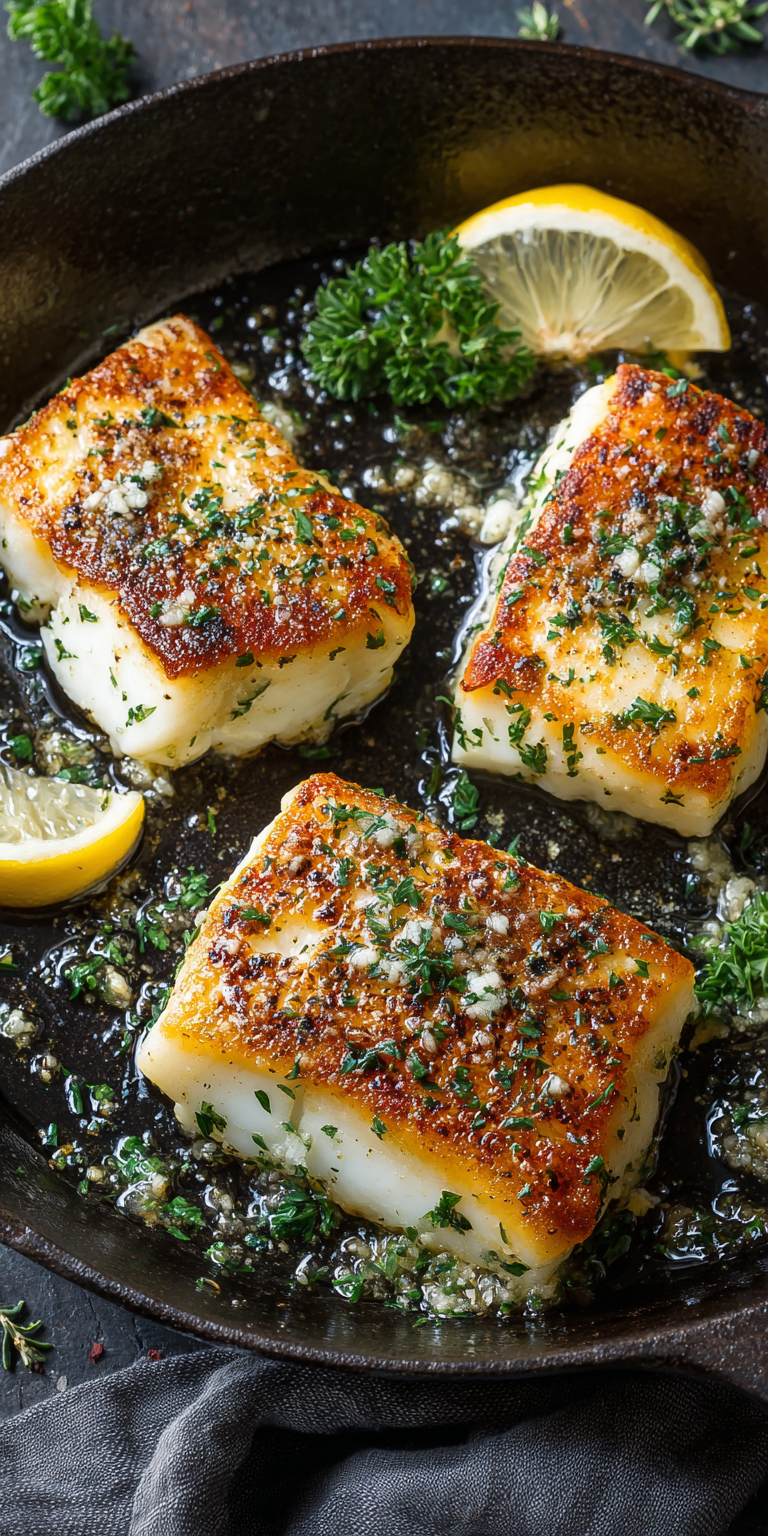
Pan Seared Halibut Seafood Dishes Recipe
The “Upgraded” Ingredient List
The Pro-Method (Step-by-Step)
Notes
Enjoy your homemade Pan Seared Halibut Seafood Dishes Recipe!
Nutrition Information
That sound you’re listening for isn’t a sizzle. It’s a confident, steady sear. If it’s sputtering wildly, your fish is too wet.
The “Upgraded” Ingredient List
Every item here has a job. Quality matters.
- 2 (6-8 oz) skinless halibut fillets, about 1-inch thick
- Kosher salt and freshly ground black pepper
- 1 tbsp high-heat oil (grapeseed or avocado)
- 1 tbsp unsalted butter
- 2 garlic cloves, lightly smashed
- 2 sprigs fresh thyme or rosemary
- 1/4 cup dry white wine or vermouth
- 2 tbsp fresh lemon juice
- 2 tbsp cold unsalted butter, cubed
- 1 tbsp fresh parsley or chives, chopped
The Pro-Method (Step-by-Step)
Follow this order. It’s designed for maximum flavor and perfect texture.
- Temperature & Dry: Take your halibut fillets out of the fridge. Pat them aggressively dry with paper towels. Season all sides generously with salt and pepper. Let them sit on the counter for 10-15 minutes.
- Pan Heat: While the fish rests, get your pan ready. Use a heavy stainless steel or cast iron skillet. Place it over medium-high heat. Let it get properly hot for a full 2 minutes.
- The Sear: Add the 1 tbsp of high-heat oil to the pan. It should shimmer immediately. Carefully place the fillets in, giving them space. Do not crowd the pan. Do not touch them. Cook for 4-5 minutes.
- The Flip & Baste: When the edges are golden and the fish releases on its own, flip. Immediately add the 1 tbsp of butter, garlic, and herbs to the pan. Tilt the pan and spoon the foaming butter over the fish constantly for 3-4 minutes.
- Rest the Fish: Transfer the beautiful, cooked halibut to a warm plate. Let it rest. This keeps it juicy.
- Make the Pan Sauce: To the same hot pan, pour in the white wine. It will bubble and steam. Scrape up all the browned bits—that’s flavor. Let it reduce by half. Turn heat to low. Whisk in the lemon juice and the cold, cubed butter until creamy. Off heat, stir in the fresh herbs.
- Serve: Plate the rested halibut. Spoon the luxurious pan sauce over the top. Serve immediately.
Common Mistakes & How to Fix Them
Problem: The fish sticks and tears. Fix: Your pan wasn’t hot enough, or you moved the fish too soon. Wait for the shimmering oil and listen for that steady sear. The fish will tell you when it’s ready to flip.
Problem: A pale, soggy crust. Fix: You didn’t dry the fish enough. Pat it, then pat it again. Moisture is the enemy of browning. The air-dry trick in the fridge is your best friend here.
Problem: A broken, greasy pan sauce. Fix: You added cold butter to a sauce that was too hot, or you stopped whisking. Take the pan off the direct heat. Add the butter slowly, and whisk constantly until it’s all melted and emulsified.
Variations for the Adventurous Cook
Once you own the basic method, play with it. That’s where the fun begins.
Swap the white wine for a dry sherry or a splash of vermouth for a nuttier sauce. Add a teaspoon of capers or chopped cornichons to the sauce for a bright, briny punch.
For a richer finish, stir a tablespoon of crème fraîche into the finished sauce. Try a different herb—tarragon is classic with fish for a reason. If you love the combination of meat and potatoes, you might also enjoy a cheesy, comforting skillet dish for a different kind of one-pan dinner.
Nutrition Notes
This is a light meal that doesn’t skimp on satisfaction or flavor.
- High-quality protein from the halibut.
- Healthy fats from the oil and butter.
- Low in carbohydrates.
- Rich in selenium, phosphorus, and vitamin B12.
- Using the full amount of sauce, this is a balanced, nutrient-dense healthy dinner.
Your Pro-Level Questions Answered
These are the questions I get from cooks who want to level up.
Can I use skin-on halibut?
You can, but halibut skin is thin and can be tricky. For skin-on, start with the skin-side down in the cool pan with a bit of oil. Use a spatula to press it flat for the first 30 seconds to prevent curling. Cook it 80% on the skin side until it’s super crispy, then just kiss the other side to finish.
What’s the best side for this rich pan sauce?
You want something to soak up that goodness. Simple roasted asparagus, sautéed spinach, or creamy mashed potatoes are perfect. For a lighter option, a crisp fennel and citrus salad cuts through the richness beautifully.
My fish is thinner/thicker than 1 inch. How do I adjust?
This is key. For thinner fillets, just sear one side and barely cook the second. The carryover heat will finish it. For thicker fillets, after searing, you can add a lid to the pan for the last minute or two, or finish in a 400°F oven for 3-5 minutes. Always check with a fork—it should flake easily.
A Few Final Secrets
The real magic is in the confidence. Trust the process. Trust the heat. Trust that resting the fish is an active step, not a passive wait.
This dish proves that a light meal can be the most impressive thing on your table. It’s about technique, not a laundry list of ingredients. Once you get this right, you’ll see all seared proteins in a new light. For another fantastic, family-friendly option that uses similar one-pan principles, check out this hearty ground beef and potato recipe.
Now that you have the secrets, I want to hear from you. Did the room-temp trick change your game? What’s your favorite twist on the pan sauce? Tell me all about it in the comments below—your tips might just be the next pro-method I share!