You’ve made banana bread a hundred times. You’ve even made baked donuts before. But I’m about to show you a trick for Banana Donut Holes: Indulge in a Guilt-Free Treat! that changes the game completely. If you love using ripe bananas for healthy baked treats like these wholesome banana oatmeal muffins, you’ll adore this new method.
It’s not about adding something fancy. It’s about taking something away. This one shift in your method gives you a treat that’s impossibly light, sweet, and satisfying without the usual heaviness.
Ready to see how it’s done? Let’s get into my kitchen.
Recipe Overview
This is my go-to when I need a sweet fix that feels smart. It’s simple, fast, and uses what you already have.
- Cuisine: American
- Category: Baked Dessert / Snack
- Prep Time: 10 minutes
- Cook Time: 10-12 minutes
- Total Time: 25 minutes
- Servings: About 24 donut holes
The Secret Ingredient That Makes All the Difference
Here it is: we’re skipping the oil and butter. Completely. I know it sounds crazy for a baked good.
But hear me out. The overripe banana isn’t just for flavor here. It becomes the sole source of fat and moisture. When you mash it perfectly, it creates a rich, creamy base that binds everything together.
This is why they taste so clean and bright. You get pure banana sweetness in every single bite, without any greasy aftertaste. It’s the magic trick that makes them guilt-free.
Why This Method is Better (My Pro-Tips)
I’ve tested every version. This process gives you the best texture, hands down.
First, you must mash the banana into a smooth, almost liquid paste. No chunks allowed. This integrates it fully into the batter for even moisture.
Banana Donut Holes: Indulge in a Guilt-Free Treat! Recipe
The “Upgraded” Ingredient List
The Pro-Method (Step-by-Step)
Notes
Enjoy your homemade Banana Donut Holes: Indulge in a Guilt-Free Treat! Recipe!
Nutrition Information
Second, we mix the wet and dry ingredients separately. Then, we combine them with as few strokes as possible. Overmixing is the enemy of a tender crumb.
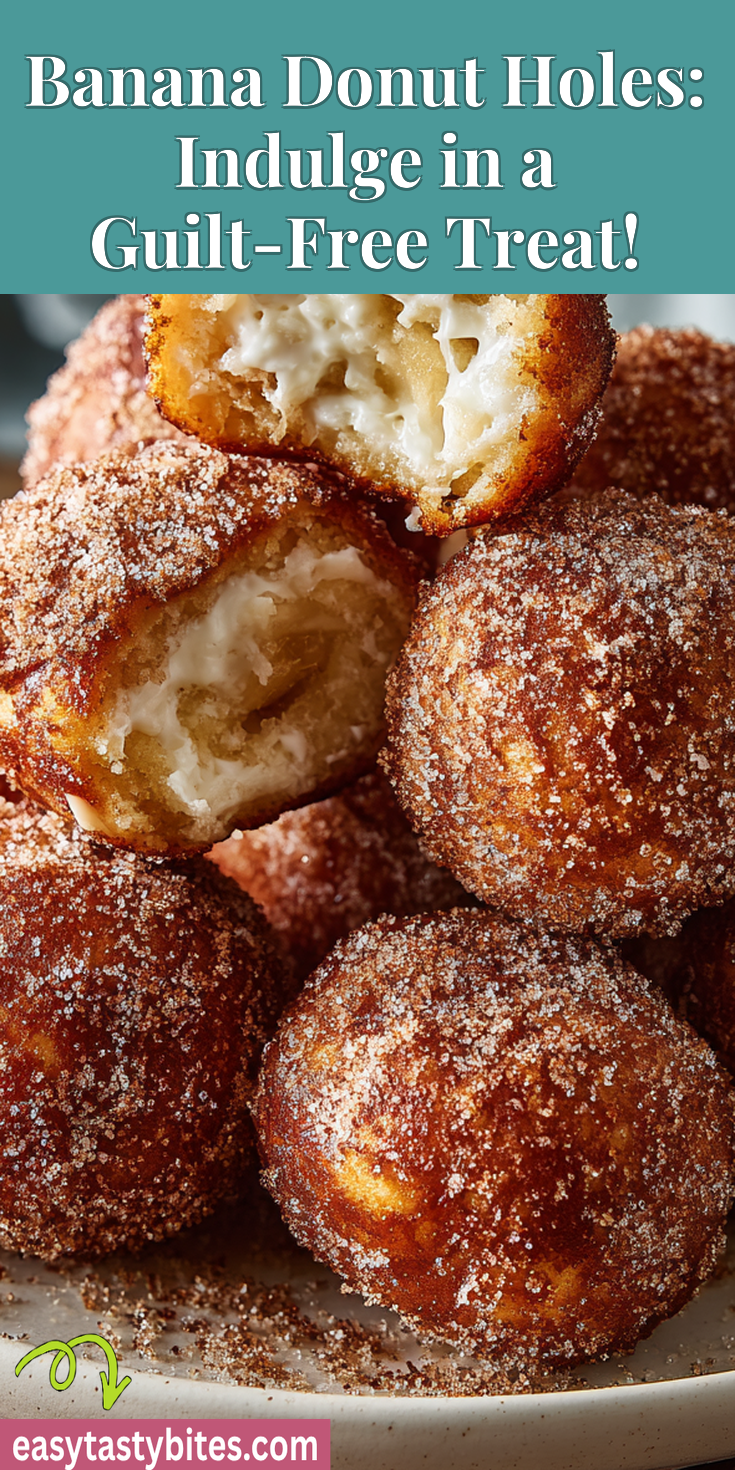
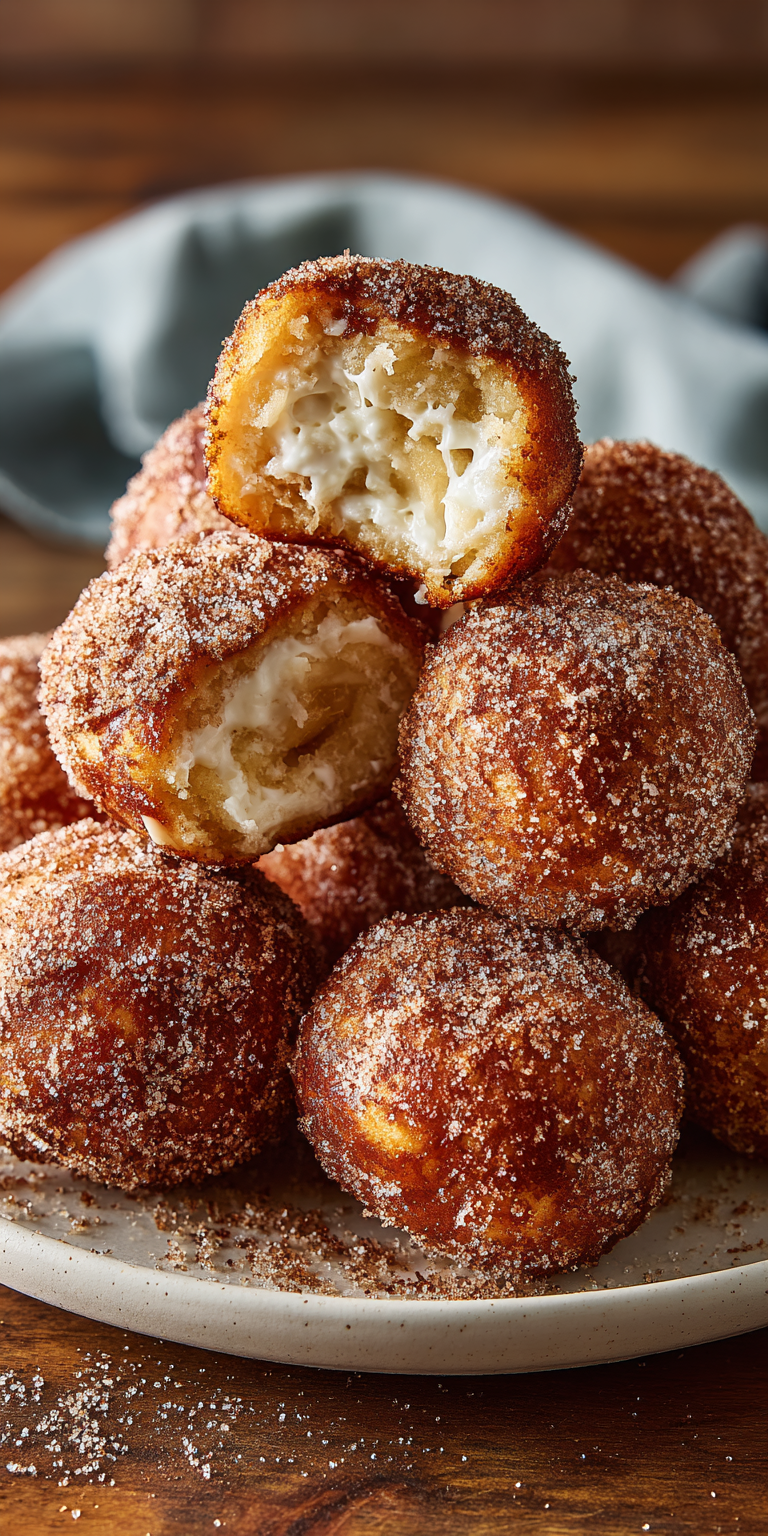
Finally, we use a mini muffin tin. It gives you that perfect “hole” shape with a lovely little crust all around. No special pan needed.
The “Upgraded” Ingredient List
Every item here has a job. Using the best you have makes a noticeable difference.
- 2 large, very ripe bananas (the blacker spots, the better)
- 1/3 cup pure maple syrup or honey
- 1 large egg, at room temperature
- 1 tsp pure vanilla extract
- 1 1/2 cups white whole wheat flour or all-purpose
- 1 tsp baking soda
- 1/2 tsp fine sea salt
- 1/2 tsp ground cinnamon
- Optional coating: 2 tbsp coconut sugar mixed with 1/4 tsp cinnamon
The Pro-Method (Step-by-Step)
Follow these steps in order. Precision in the process is what makes these pro-level.
- Heat your oven to 350°F (175°C). Lightly spray a 24-cup mini muffin tin with oil. Do not use paper liners.
- In a large bowl, mash the bananas until completely smooth and liquidy. A few small lumps are okay, but aim for smooth.
- Whisk the maple syrup, egg, and vanilla into the banana mash until it’s one uniform, creamy liquid.
- In a separate bowl, whisk the flour, baking soda, salt, and cinnamon together. This makes sure the leavening is evenly distributed.
- Pour the dry ingredients into the wet. Use a spatula to fold them together. Stop as soon as you see no more dry flour streaks. The batter will be thick.
- Spoon the batter into the muffin cups, filling each about 3/4 full. A small cookie scoop is perfect for this.
- Bake for 10-12 minutes. They’re done when the tops spring back lightly to the touch.
- Let them cool in the pan for 2 minutes, then transfer to a wire rack. Roll the warm holes in the cinnamon coconut sugar, if using. It will stick perfectly. For another fantastic way to enjoy crispy, cinnamon-spiced bananas, try making crispy cinnamon sugar banana chips in the air fryer.
Common Mistakes & How to Fix Them
Even great cooks hit snags. Here’s how to avoid the big ones.
Problem: The holes are dense and gummy inside.
Fix: You likely overmixed the batter. Or, your baking soda is old. Test it with vinegar. Fold, don’t stir, and use fresh leavener.
Problem: They stick to the pan terribly.
Fix: You skipped the spray. Even a non-stick pan needs a very light coating for these. Also, let them cool just 2 minutes—no longer—before popping them out.
Problem: They aren’t sweet enough.
Fix: Your bananas weren’t ripe enough. The sweetness comes from them. If needed, add an extra tablespoon of maple syrup to the batter next time.
Variations for the Adventurous Cook
Once you master the base, play with it. These are my favorite high-level twists.
Add 1/4 cup of cacao powder to the dry ingredients for a chocolate-banana version. You may need a splash of milk if the batter gets too thick.
Fold in 1/3 cup of chopped, toasted walnuts or pecans with the dry ingredients. The nutty crunch against the soft interior is fantastic.
For a lemon-poppy seed vibe, add the zest of one lemon and 1 tablespoon of poppy seeds to the dry mix. It brightens the whole flavor profile.
Nutrition Notes
This is why you can feel good about these. Per donut hole (without sugar coating):
- Calories: ~45
- Fat: 0.5g
- Carbohydrates: 10g
- Fiber: 1g
- Protein: 1.5g
- Naturally low in fat and a source of fiber from the banana and whole wheat flour.
Your Pro-Level Questions Answered
These are the questions I get from cooks who really pay attention to details.
Can I make these completely gluten-free?
Absolutely. Swap the flour for a 1:1 gluten-free baking blend. The result will be slightly more delicate, but just as delicious. Make sure your blend contains xanthan gum.
My batter seems too thick. Did I do something wrong?
Probably not. The batter is meant to be quite thick—almost like a soft cookie dough. This is what gives the donut holes their structure. If it’s truly dry and crumbly, your bananas might have been small. Add a teaspoon of milk to loosen it slightly.
Can I freeze these for later?
Yes, they freeze beautifully. Let them cool completely, then store in a single layer in a freezer bag for up to 2 months. Thaw at room temperature or warm them in a toaster oven for a minute.
A Few Final Secrets
Here’s the insider knowledge that ties it all together. The real goal is a treat that doesn’t weigh you down.
Serve these warm. The flavor and texture are at their peak right after they’ve cooled just enough to handle.
If you skip the sugar coating, try a light drizzle of thinned nut butter or a quick dip in Greek yogurt. It adds a protein boost and feels decadent.
Remember, this recipe is a template. The banana is your canvas. Now that you know the core technique—the no-added-fat secret—you can make it your own. And if you’re looking for a completely sugar-free banana snack, you must try these delicious sugar-free cinnamon air fryer banana chips.
I want to hear how your batch turns out. Did the no-butter trick blow your mind? What variation did you try? Share your results and your own tips in the comments below. Happy baking!