You’ve made stuffed bell peppers before. I know you have. But I bet they were a bit dry, or the filling was bland, or the whole thing felt like diet food.
This Corned Beef Stuffed Bell Peppers recipe is different. It has one secret ingredient that changes everything, turning it from simple to spectacular. Ready to find out what it is?
We’re not just stuffing peppers here. We’re building layers of savory, salty, and cheesy flavor that bake into a complete, comforting meal. It’s a healthy dinner that doesn’t taste like one, and it’s naturally gluten free. Let’s get into my kitchen and I’ll show you how it’s done.
Recipe Overview
Here’s the game plan. This is your roadmap to a perfect, hassle-free bake.
- Cuisine: American Fusion
- Category: Main Course
- Prep Time: 20 minutes
- Cook Time: 35 minutes
- Total Time: 55 minutes
- Servings: 4-6
The Secret Ingredient That Makes All the Difference
Most recipes stop at the corned beef and rice stuffing. We don’t. The secret is Russian or Thousand Island dressing.
I know it sounds wild. But think about a Reuben sandwich. What makes it magic? The tangy, creamy dressing cutting through the salty meat. That’s exactly what happens here.
Adding a few tablespoons to the filling binds it with moisture and a subtle, complex tang. It boosts the corned beef flavor without overpowering it. This is the pro move that separates good stuffed peppers from great ones.
Why This Method is Better (My Pro-Tips)
I’ve tested every variable. These two tips are non-negotiable for the best texture.
First, we par-boil the peppers. Don’t skip this. A quick 3-4 minute blanch in boiling water softens them just enough. This means they bake evenly with the filling, instead of staying crunchy while the inside burns.
Second, we create a cheese melt barrier. We mix some cheese right into the hot rice stuffing. The heat starts to melt it, creating a glue that holds everything together in every single bite.
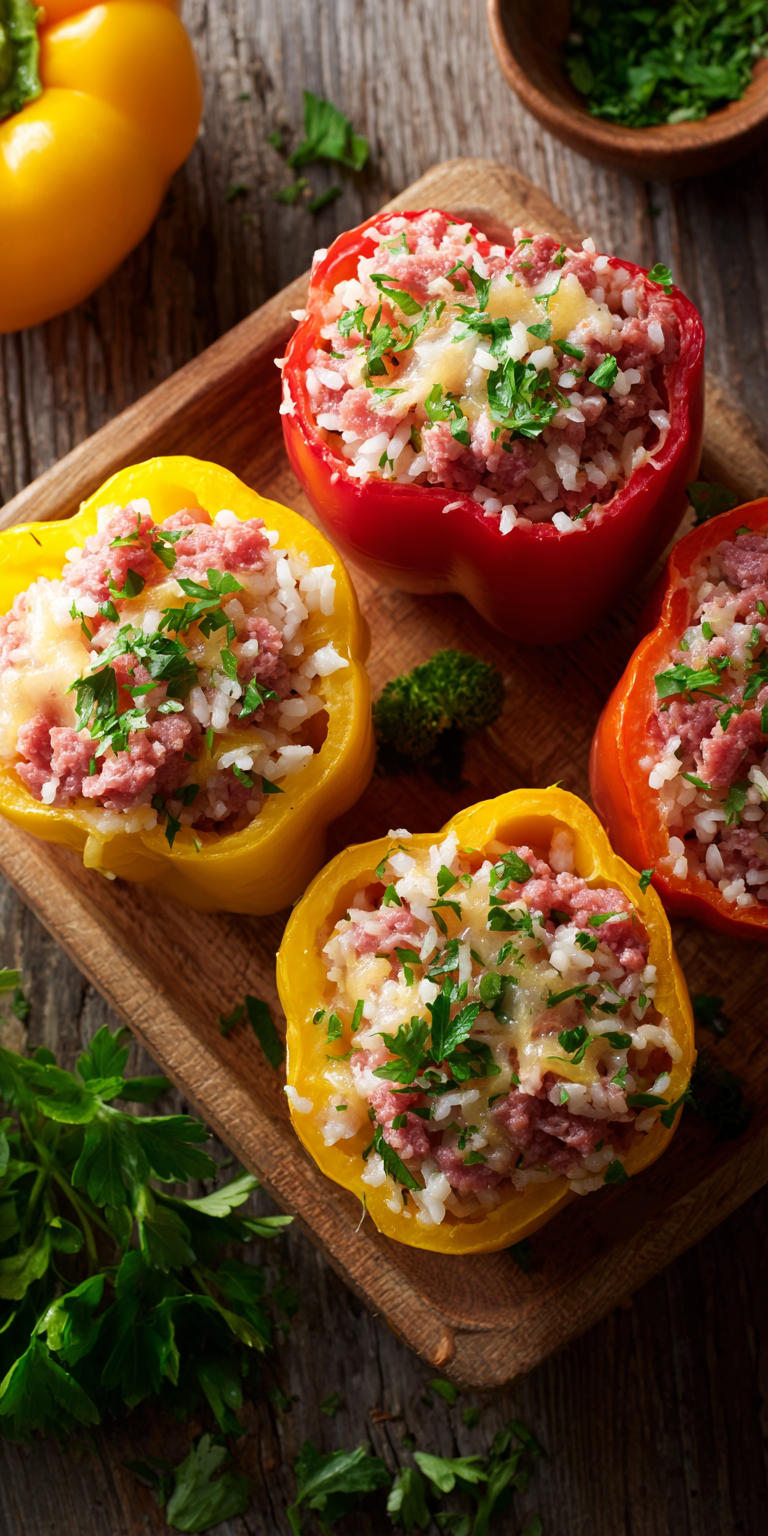
Corned Beef Stuffed Bell Peppers Recipe
The “Upgraded” Ingredient List
The Pro-Method (Step-by-Step)
Notes
Enjoy your homemade Corned Beef Stuffed Bell Peppers Recipe!
Nutrition Information
The “Upgraded” Ingredient List
Gather these. Quality matters, especially with the star players.
- 4 large bell peppers (any color, but I love red for sweetness)
- 1 tbsp olive oil
- 1 medium yellow onion, finely diced
- 2 cloves garlic, minced
- 12 oz canned corned beef, broken into chunks
- 2 cups cooked white rice (day-old is perfect)
- 1 cup shredded Swiss cheese, divided
- 1/4 cup Russian or Thousand Island dressing
- 1 tsp smoked paprika
- 1/2 tsp black pepper
- 1/4 cup beef broth or water
- Fresh parsley for garnish (optional)
The Pro-Method (Step-by-Step)
Follow these steps in order. This is where the magic happens.
- Heat your oven to 375°F (190°C). Get a baking dish ready.
- Cut the bell peppers in half lengthwise. Remove the seeds and ribs. Bring a large pot of salted water to a boil.
- Carefully lower the pepper halves into the boiling water. Let them cook for 3-4 minutes just to soften. Remove and drain them cut-side down on paper towels.
- While they drain, heat olive oil in a large skillet over medium heat. Add the diced onion and cook until soft, about 5 minutes.
- Add the minced garlic and cook for 1 more minute until fragrant. Now, add the corned beef chunks. Use your spoon to break it up and mix it with the onions.
- Stir in the cooked rice, smoked paprika, and black pepper. Cook for 2-3 minutes to warm through. Take the skillet off the heat.
- This is key: Immediately stir in 3/4 cup of the Swiss cheese and the Russian dressing. The residual heat will start to melt the cheese, creating that perfect binding glue.
- Arrange the par-boiled pepper halves in your baking dish. Divide the filling evenly among them, packing it in nicely. Pour the beef broth into the bottom of the dish around the peppers.
- Sprinkle the remaining 1/4 cup of cheese over the top of each stuffed pepper.
- Cover the dish tightly with foil and bake for 20 minutes. Then, remove the foil and bake for another 10-15 minutes, until the cheese is bubbly and slightly golden.
- Let them rest for 5 minutes before serving. This lets the filling set so it doesn’t spill out everywhere.
Common Mistakes & How to Fix Them
Even pros make mistakes. Here’s how to avoid the big ones.
Mistake #1: Soggy Pepper Bottoms. This happens if you skip the par-boil and the broth steams them from below. The quick blanch sets the structure. Also, make sure your filling isn’t overly wet before baking.
Mistake #2: Dry, Crumbly Filling. You skipped the dressing or the broth. The dressing adds fat and moisture internally. The broth in the dish creates steam, keeping everything juicy as it bakes. Don’t leave out either.
Variations for the Adventurous Cook
Mastered the base recipe? Try these pro swaps to make it your own.
Swap the corned beef for pastrami or even chopped roast beef. Use a spicy brown mustard mixed into the filling instead of Russian dressing for a sharper kick. If you love the classic pairing, you could even use the filling from a traditional Corned Beef and Cabbage dish as inspiration.
Try using cauliflower rice for a lower-carb version. Just sauté it with the onions to remove moisture. For the cheese melt, experiment with Gruyère or a sharp white cheddar.
Nutrition Notes
This is a balanced, hearty meal. Here’s a general breakdown per serving (based on 6 servings).
- Calories: ~380
- Protein: 22g
- Carbohydrates: 28g
- Fat: 20g
- Fiber: 3g
- Gluten Free: Yes (always check your dressing label)
Your Pro-Level Questions Answered
These are the questions my cooking students always ask.
Can I make these stuffed peppers ahead of time?
Absolutely. Assemble them completely in the baking dish. Cover tightly and refrigerate for up to 24 hours. When you’re ready, add 5-10 minutes to the covered baking time since you’re starting from cold.
What’s the best rice to use for the stuffing?
You want a rice that holds its shape. Day-old jasmine or basmati rice is my top choice. Avoid freshly cooked, hot rice—it can get mushy. If you must use fresh, spread it on a tray to cool and dry slightly first.
My corned beef is very salty. How do I balance it?
Great palate! Rinse the canned corned beef under cool water for a few seconds and pat dry. The tang from the Russian dressing will also help cut through any remaining saltiness perfectly.

A Few Final Secrets
You now have the blueprint. But the real secret is confidence. Trust the process, especially the par-boil and the dressing.
This recipe is forgiving. It’s a vehicle for flavor. Once you understand the core technique—softening the vessel, building a bound filling, using steam—you can stuff anything with anything. Leftover filling? It makes an incredible corned beef pie the next day.
That’s the true mark of a cook who’s moved beyond just following recipes. You’re understanding how food works. And that’s the best kitchen secret of all.
Now that you have the inside track, I need to know. Go try it this week. Did the Russian dressing change the game for you? What variations did you create? Tell me everything in the comments below—your ratings and notes help all of us get better in the kitchen!