Give it up, my sweet friend! You cannot resist the magic of these DIY Yogurt Melts. Come to Mama!
I am literally obsessed. I dream about these little clouds of creamy, tangy, frozen joy. And today, I’m sharing all my secrets with you.
We’re talking about the ultimate healthy snack hack. It’s so easy, you’ll laugh. Perfect for tiny hands, lunch boxes, or when you need a quick, cool treat yourself.
Get ready to fall in love. Let’s make some magic!
Recipe Overview
- Cuisine: American
- Category: Snack
- Prep Time: 10 minutes
- Cook Time: 3-4 hours (freezing)
- Total Time: 4 hours 10 minutes
- Servings: Makes about 60 melts
Do You Love This Recipe Too?
My obsession started when my niece was a toddler. I wanted to give her something fun and healthy.
Store-bought versions had extra sugar and weird stuff. I knew we could do better. So I got to work in my kitchen.
The first batch was a revelation. They were so creamy and delicious! Now, I make them all the time. For her, for me, for everyone.
It’s my go-to easy snack for any occasion. I just can’t get enough!
My Shopping List for This Recipe
I keep it super simple. You only need two key things to start. That’s it!
DIY Yogurt Melts Recipe

Let’s Get Your Ingredients Ready
Bringing This Recipe to Life (Step-by-Step)
Notes
Enjoy your homemade DIY Yogurt Melts Recipe!
Nutrition Information
The magic is in the quality. Grab the best stuff you can find, and you’re halfway there.
Let’s Get Your Ingredients Ready
Gather these two heroes. Check your fridge, you might already have them!
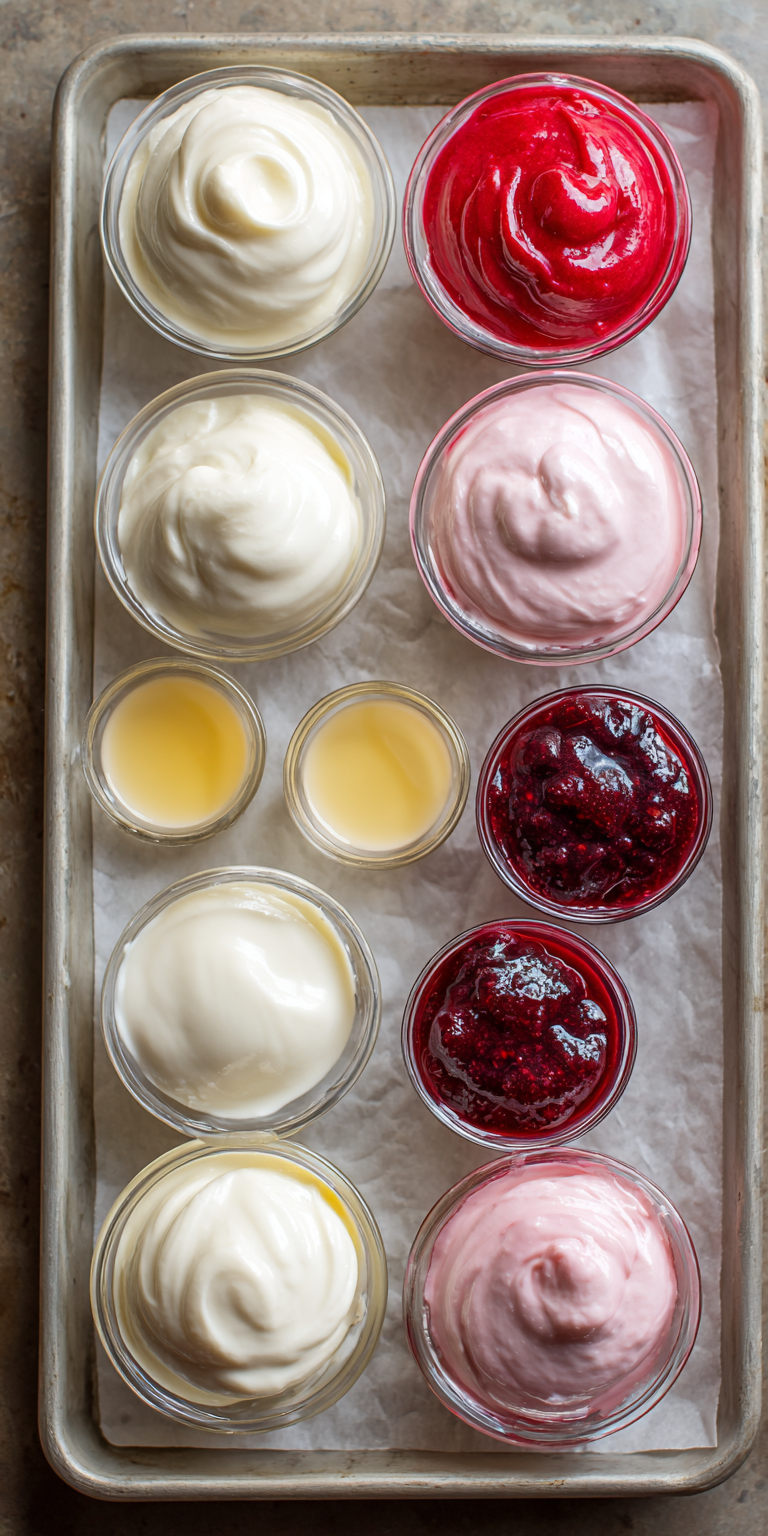
- 2 cups plain, full-fat Greek yogurt
- 2-3 tablespoons of a mix-in (see ideas below!)
Bringing This Recipe to Life (Step-by-Step)
Here we go! The fun part. This is where the magic happens, I promise.
- Line a large baking sheet with parchment paper or a silicone baking mat. This is non-negotiable for easy peeling later.
- In a medium bowl, stir your Greek yogurt until it’s smooth and creamy. No lumps allowed!
- Now, fold in your chosen mix-in. Gently stir until it’s just combined. You want pretty swirls!
- Transfer your yogurt mix to a piping bag or a zip-top bag. Snip a very small corner off the bag.
- Pipe small dots (about 1 teaspoon each) onto your prepared baking sheet. Leave a little space between them.
- Carefully place the tray in the freezer. Let them freeze solid! This takes at least 3-4 hours.
- Once they’re completely frozen, pop them off the paper. Transfer to a freezer bag or container. Enjoy straight from the freezer!
Fun Variations to Try Next Time
Don’t stop at plain yogurt! This is where you can get crazy creative. Here are my favorite twists.
Berry Blast: Swirl in 2 tablespoons of mashed raspberries or strawberry puree. So pretty and fruity! For another fruity frozen treat, you have to try our strawberry yogurt bites.
Peachy Keen: Add 2 tablespoons of peach puree and a tiny dash of cinnamon. It’s like summer in a bite.
Green Monster: Blend a handful of spinach into the yogurt before piping. The kids will never know! A perfect healthy toddler snack trick.
How to Store, Freeze, and Reheat
Good news! These are made for the freezer. They last for ages.
Keep them in a sealed container or freezer bag. They’ll stay good for up to 2 months.
There’s no need to reheat! Eat them frozen. They melt perfectly in little mouths. If they stick together, just give the bag a good whack on the counter.
NUTRITION INFORMATION
- Serving Size: About 10 melts
- Calories: ~50
- Protein: 8g
- Fat: 0g (with non-fat yogurt)
- Carbohydrates: 3g
- Sugar: 2g (naturally occurring)
A Quick Q&A on This Recipe
Can I use regular yogurt instead of Greek?
You can, but Greek is my hero here. It’s thicker, so your melts hold their shape better. Regular yogurt can get a bit icy. If you use it, strain it in a cheesecloth for an hour first!
Are these good for school snacks?
Yes! They are the perfect school snack. Pack them in a small insulated container. They’ll stay cold and be just starting to soften by snack time. A total lunchbox win.
My melts are sticky! What did I do wrong?
Nothing! They just need more time. Freeze them longer, I promise. A full 4 hours is best. If your kitchen is warm, give them even more time. Patience is key.
See? I told you it was easy. These little yogurt bites are life-changing.
They are fun, healthy, and you control everything that goes in them. That’s a huge win in my book. Whether you need quick snacks for kids or a bariatric-friendly treat for yourself, this recipe has your back. If you’re looking for another fantastic way to use yogurt, our simple yogurt toast is a warm and delicious option.
Now it’s your turn! Go make a batch and taste the joy. I’m so excited for you.
I can’t wait to hear how yours turns out! What mix-in will you try first? Please leave a comment and a rating below to let me know what you think!