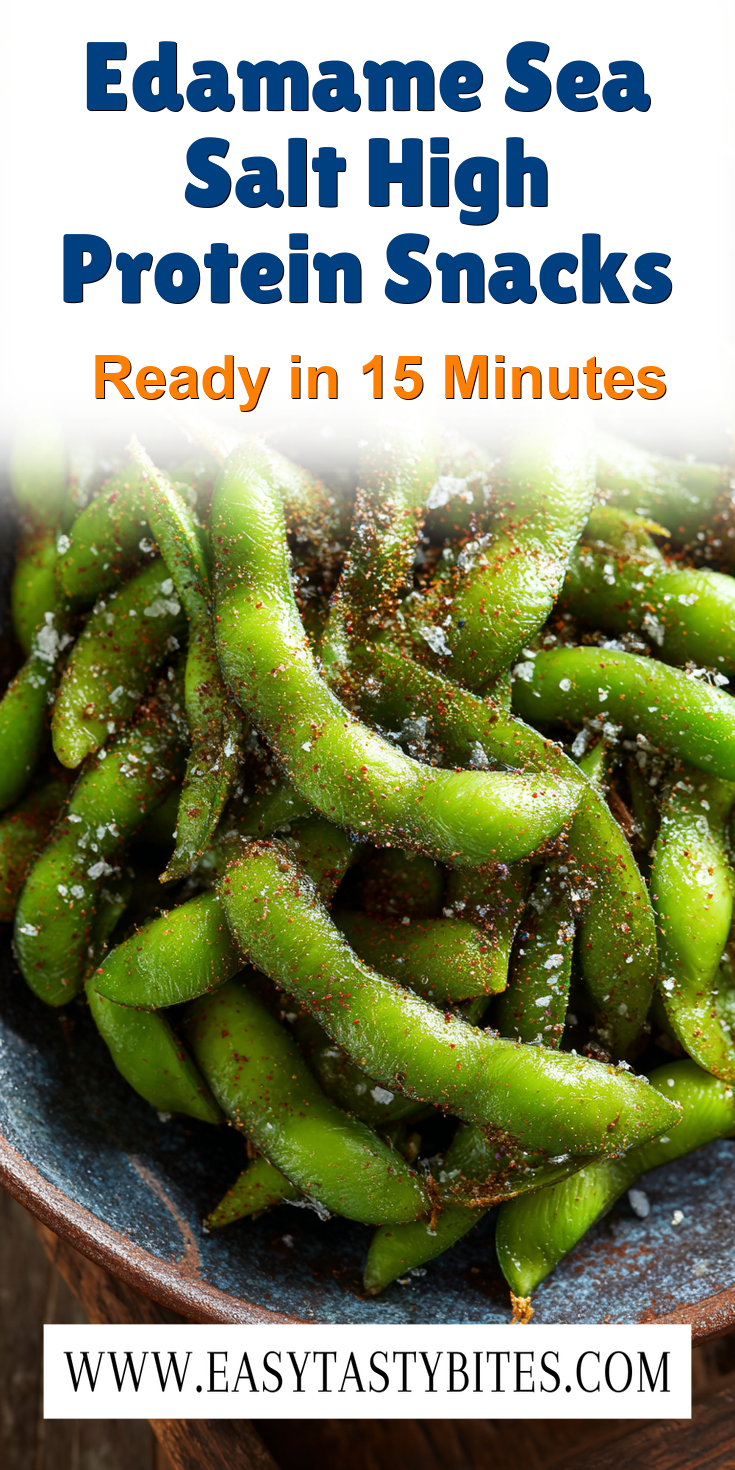

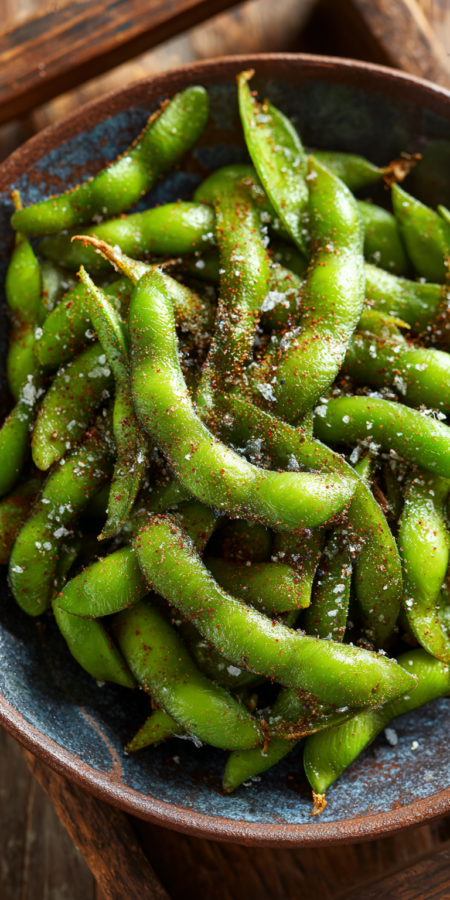
You’ve made roasted edamame before. You know it’s a great snack. But I’m willing to bet it’s never been this good, this crisp, or this addictive. It’s the perfect high-protein snack to keep on hand.
Your standard Edamame Sea Salt High Protein Snacks are missing one secret step. It’s the difference between a good vegan snack and a pro-level Japanese appetizer that disappears in minutes.
Ready to find out what it is? Let’s get into my kitchen.
Recipe Overview
This is your blueprint for the ultimate plant protein snack.
- Cuisine: Japanese-Inspired
- Category: Snack / Appetizer
- Prep Time: 5 minutes
- Cook Time: 40-50 minutes
- Total Time: 55 minutes
- Servings: 4
The Secret Ingredient That Makes All the Difference
It’s not in the ingredient list. It’s in the prep. The secret is patience and a complete dry bean.
Most recipes have you toss frozen edamame beans with oil and salt straight from the bag. That steaming moisture is your enemy. It creates steam in the oven, which leads to a chewy, not crunchy, result. My secret? You must thaw and thoroughly, obsessively, dry those beans first. Every single drop of water must go.
Why This Method is Better (My Pro-Tips)
I’ve tested every variable. This method gives you a shatteringly crisp shell and a tender, fluffy interior.
The key is low, slow heat to dehydrate, then a final blast to crisp. Rushing this with high heat only burns the outside. We’re not just roasting; we’re transforming the texture from the inside out. It’s a different approach than a quick high-protein garlic chicken fried rice, but the principle of building layers of flavor and texture is the same.
The “Upgraded” Ingredient List
Simple ingredients, treated with care. That’s the mantra.
Edamame Sea Salt High Protein Snacks Recipe
The “Upgraded” Ingredient List
The Pro-Method (Step-by-Step)
Notes
Enjoy your homemade Edamame Sea Salt High Protein Snacks Recipe!
Nutrition Information
- 4 cups frozen edamame beans (in the pod)
- 2 teaspoons high-heat oil (like avocado or refined coconut)
- 1 ½ teaspoons fine sea salt, divided
- ½ teaspoon granulated sugar (trust me, it’s a flavor booster)
The Pro-Method (Step-by-Step)
Follow these steps in order. Do not skip ahead.
- Spread the frozen edamame in a single layer on a sheet pan. Let it sit for 30-45 minutes to thaw completely.
- This is critical: Pile the beans onto a clean kitchen towel. Roll them up and rub them vigorously to dry every pod. Get them bone-dry.
- Preheat your oven to 300°F (150°C). Line a sheet pan with parchment paper.
- In a large bowl, mix the dry beans with the oil and 1 teaspoon of the sea salt. Toss for a full minute to coat evenly.
- Spread the beans in a single, uncrowded layer on the pan. Roast for 35 minutes.
- Remove the pan. Increase your oven heat to 400°F (200°C). While it heats, sprinkle the beans with the remaining ½ teaspoon salt and the sugar.
- Return the pan to the hot oven for 5-10 final minutes. Watch closely until they are golden and crisp.
- Let them cool completely on the pan. They crisp up as they cool.
Common Mistakes & How to Fix Them
Even advanced cooks make these errors. Let’s fix them for good.
Problem: The beans are chewy or soft. Fix: You didn’t dry them well enough. Or, you crowded the pan. Steam is the culprit. Always dry thoroughly and use two pans if you need to for a single layer.
Problem: The salt won’t stick. Fix: You added the salt at the wrong time. The oil at the start helps the initial salt adhere. The final sprinkle after the low roast sticks to the now-dry, slightly textured surface perfectly.
Variations for the Adventurous Cook
Once you master the base, the world of flavor is yours.
For a spicy kick, add ¼ teaspoon of cayenne or smoked paprika with the oil. For an umami bomb, toss the warm beans with a sprinkle of shichimi togarashi or nutritional yeast after baking. You can even swap the sea salt for a flaky finishing salt like Maldon for a fantastic texture contrast.
Nutrition Notes
This is where this snack really shines. Per serving (about 1 cup of pods):
- Calories: ~180
- Protein: 14g (A serious plant protein punch)
- Fiber: 8g
- Fat: 8g (Mostly unsaturated)
- Carbs: 15g
- Naturally cholesterol-free and packed with vitamins.
Your Pro-Level Questions Answered
These are the questions I get from readers who know their way around a kitchen.
Can I use shelled edamame?
You can, but the pod protects the bean and gives you that incredible textural journey from crisp to tender. Shelled beans can dry out too much. Stick with in-pod for the best experience.
How do I store these to keep them crisp?
Let them cool completely. Then, store them in a paper bag or a container with the lid slightly ajar at room temperature. A sealed container traps residual moisture and makes them soft. They’re best within 2 days.
My oven runs hot. Any advice?
Absolutely. If your oven is fierce, start the low-temp phase at 275°F. Extend the time by 10 minutes. Watch the final high-heat phase like a hawk—it may only need 3-5 minutes.
A Few Final Secrets
This isn’t just a recipe. It’s a technique you can apply to other vegetables. The principle of thorough drying and staged roasting is a game-changer.
The small amount of sugar isn’t for sweetness. It promotes browning and balances the salt in a way that makes the flavor pop. Don’t skip it.
Finally, the best tool you have is your palate. Taste one after they cool. Need more salt? Add a tiny sprinkle. Make this recipe yours. If you love this style of make-ahead, high-protein food, you should definitely try my high-protein egg bites for breakfast meal prep.
Now you have the real secret. I want to hear from you. Did the drying step change everything for you? What variations did you try? Rate this method and tell me your results in the comments below!

 Tired of the 5 PM dinner panic? Grab my new 30-Minute Cookbook!