
You’ve made lemon bars before. I know you have. But you’ve never made them like this. The classic version is good, but it’s missing a layer of flavor that takes it from a simple sweet to a dessert that makes people stop and ask for your secret. If you love the bright combination of lemon and berry, you should also try our recipe for Zesty Lemon Raspberry Cookies for another burst of summer flavor.
Today, I’m sharing my recipe for Lemon Raspberry Bars. This one has a twist that changes everything. It solves the most common problem with fruit bars and gives you a perfect, clean slice every single time. Ready to find out what it is?
Recipe Overview
Here’s the quick look at what we’re making. It’s simpler than you think, but the details make it special.
- Cuisine: American
- Category: Dessert
- Prep Time: 20 minutes
- Cook Time: 45 minutes
- Total Time: 4 hours 5 minutes (includes chilling)
- Servings: 16 bars
The Secret Ingredient That Makes All the Difference
It’s not in the filling. It’s in the crust. The secret is toasted sugar. Most recipes call for plain granulated sugar in the shortbread base.
Toasting your sugar first gives it a deep, caramel-like flavor without adding color. It removes the raw edge and adds a warm, complex note. This creates a beautiful contrast with the bright, tart lemon and raspberry layers.
It’s the hidden depth that makes people wonder what’s different. You just bake granulated sugar on a sheet pan at 300°F for about an hour, stirring every 10 minutes, until it’s pale golden. Let it cool completely before using. Make a big batch and keep it in a jar—you’ll use it everywhere.
Why This Method is Better (My Pro-Tips)
My method is all about control. We’re not just mixing fruit into the curd. That often leads to a soggy, murky layer and a filling that won’t set cleanly.
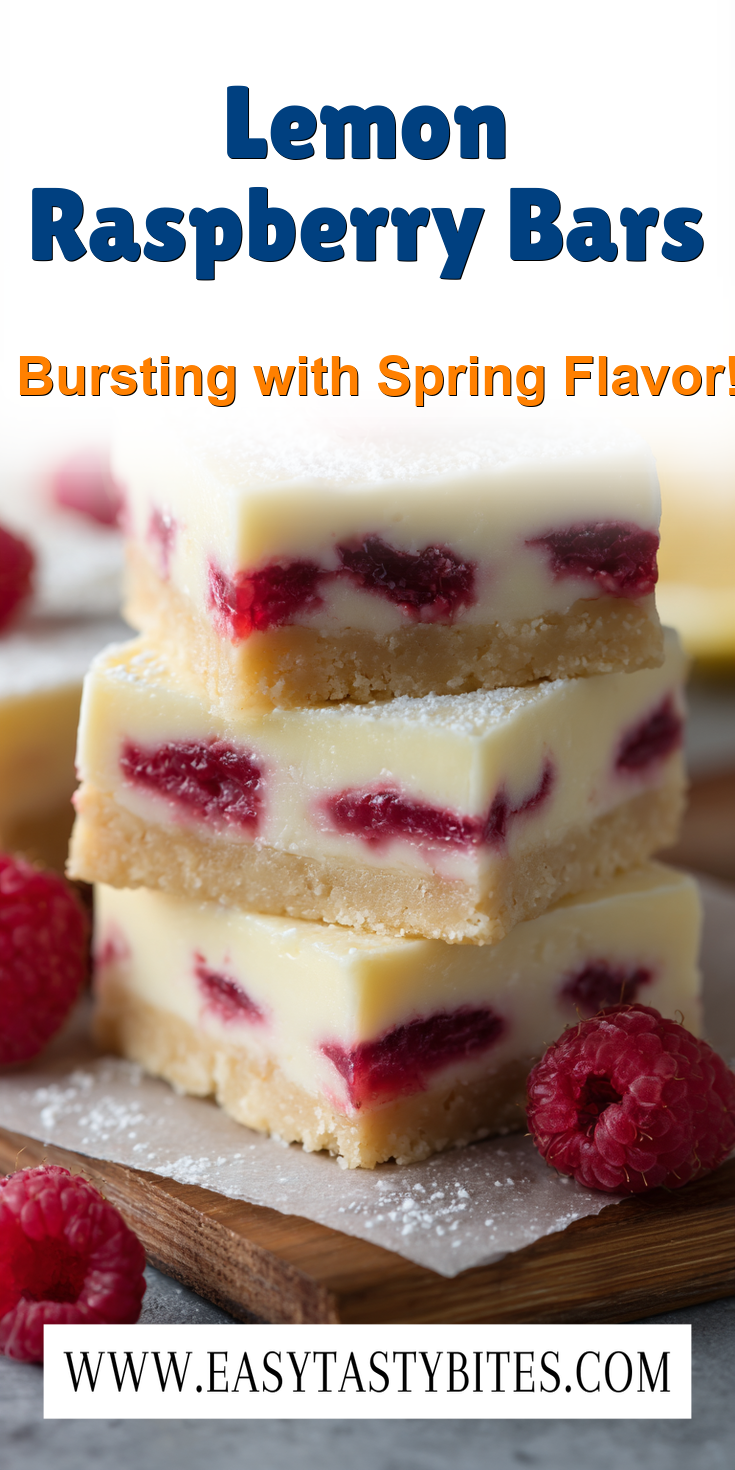
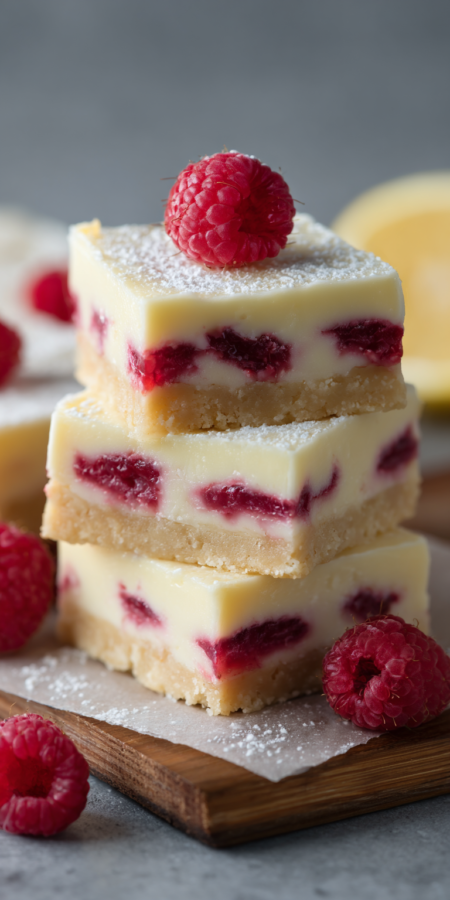
Instead, we create distinct strata. First, a crisp, buttery shortbread base made with that toasted sugar. Then, a pure, vibrant raspberry jam layer. Finally, a smooth, puckery lemon curd on top.
This separation is key. It gives you a stunning cross-section and lets each flavor shine on its own before they come together in your mouth. It’s the professional bakery technique for a reason. For another stunning layered dessert, our Lemon Blueberry Trifle uses a similar philosophy of distinct, complementary layers.
Lemon Raspberry Bars Recipe
The “Upgraded” Ingredient List
The Pro-Method (Step-by-Step)
Notes
Enjoy your homemade Lemon Raspberry Bars Recipe!
Nutrition Information
The “Upgraded” Ingredient List
Quality matters here. With so few components, each one needs to be the best you can use.
- For the Crust:
- 1 cup (2 sticks) unsalted European-style butter, cold and cubed
- 1/2 cup toasted granulated sugar (see secret above)
- 2 cups all-purpose flour
- 1/4 tsp fine sea salt
- For the Raspberry Layer:
- 1 1/4 cups high-quality raspberry jam or preserves (seedless is best for slicing)
- 1 tbsp fresh lemon juice
- For the Lemon Curd Layer:
- 4 large eggs + 2 egg yolks (the extra yolks are for richness and set)
- 1 1/2 cups granulated sugar
- 2/3 cup fresh lemon juice (about 4-5 lemons)
- 1 tbsp finely grated lemon zest
- 1/4 cup all-purpose flour
- Pinch of salt
- For Dusting:
- Powdered sugar, for serving
The Pro-Method (Step-by-Step)
Follow these steps in order. Don’t rush the chilling—it’s what gives you that perfect bar.
- Heat your oven to 350°F (175°C). Line a 9×13 inch baking pan with parchment paper, leaving an overhang on two sides for easy lifting.
- Make the crust. In a food processor, pulse the flour, toasted sugar, and salt. Add the cold, cubed butter. Pulse until the mixture looks like coarse sand and just starts to clump.
- Dump the crumbs into your prepared pan. Press them into a firm, even layer using the bottom of a measuring cup. Bake for 18-20 minutes, until the edges are just barely golden. Let it cool slightly.
- While the crust bakes, stir the raspberry jam with the 1 tbsp of lemon juice to loosen it. Spread this mixture in a thin, even layer over the warm crust.
- Make the lemon filling. In a large bowl, whisk the eggs, egg yolks, sugar, lemon juice, and zest until smooth. Sift in the flour and salt. Whisk vigorously until completely smooth and no lumps remain.
- Carefully pour the lemon mixture over the raspberry layer. It will seem thin—that’s correct.
- Return the pan to the oven. Bake for 25-30 minutes, until the filling is set and no longer jiggles in the center.
- Let the pan cool completely on a wire rack. Then, transfer it to the refrigerator. Chill for at least 3 hours, or overnight is even better.
- Use the parchment paper to lift the whole slab out of the pan. Place it on a cutting board. Trim the edges for clean lines, then cut into bars with a sharp knife wiped clean between cuts.
- Dust with powdered sugar right before serving.
Common Mistakes & How to Fix Them
Even pros run into issues. Here’s how to avoid the big ones.
Soggy Bottom Crust: This happens if the filling is too wet or you don’t pre-bake. Make sure your crust is fully baked and lightly golden before adding the jam. The jam layer also acts as a moisture barrier.
Cloudy or Grainy Lemon Layer: This is from over-whipping and incorporating too much air, or not whisking the flour in thoroughly. Whisk your filling just until combined and smooth. Sifting the flour in helps it incorporate without lumps.
Impossible to Cut Cleanly: You didn’t chill it long enough. The lemon layer needs time to set fully. Overnight chilling is the absolute best trick for razor-sharp slices.
Variations for the Adventurous Cook
Once you’ve mastered the base, play with it. These are my favorite high-end twists.
Swap the raspberry jam for a high-quality blackberry or passionfruit curd. The passionfruit adds an incredible tropical tang that pairs beautifully with lemon.
Add an herbaceous note. Steep a few sprigs of fresh thyme or basil in the warm butter for the crust before making the dough. Strain it out. It adds a subtle, sophisticated layer.
For a textural surprise, sprinkle 1/3 cup of sliced almonds over the raspberry layer before adding the lemon curd. They toast up and add a wonderful crunch.
Nutrition Notes
This is a treat, meant to be enjoyed in moderation. Here’s a rough estimate per bar.
- Calories: ~320
- Fat: 14g
- Carbohydrates: 47g
- Sugar: 33g
- Protein: 4g
Your Pro-Level Questions Answered
These are the questions I get from fellow baking enthusiasts.
Can I use frozen raspberries instead of jam?
I don’t recommend it for this specific layered method. Frozen berries release too much water and will make the bottom layer soggy. If you want a fresh berry version, you’d need a different recipe where the berries are mixed directly into a thicker batter.
My lemon layer puffed up and cracked. What went wrong?
Your oven was likely too hot, causing the eggs to over-expand. Use an oven thermometer to check accuracy. Also, avoid over-whipping the filling. Next time, try baking at 325°F and check for set at 25 minutes.
How long do these bars keep?
They keep beautifully. Store them in an airtight container in the fridge for up to 5 days. The powdered sugar will melt, so only dust the bars you’re serving that day.
A Few Final Secrets
You now have the blueprint for the best lemon raspberry dessert bars you’ll ever make. Remember, the magic is in the layers and that toasted sugar base.
These bars are more than just a sweet snack. They’re a statement. They’re the kind of pretty food that brightens a springtime meal and feels special. They prove that with a few smart tricks, you can turn a simple concept into something extraordinary. And if you’re looking to bring that same bright, citrusy flair to your dinner menu, our Lemon Garlic Butter Chicken is a perfect savory counterpart.
Now that you have the secret, go try it! Did the toasted sugar change the game for you? What variations did you experiment with? Let me know how it turned out in the comments below—I read every one!

 Tired of the 5 PM dinner panic? Grab my new 30-Minute Cookbook!