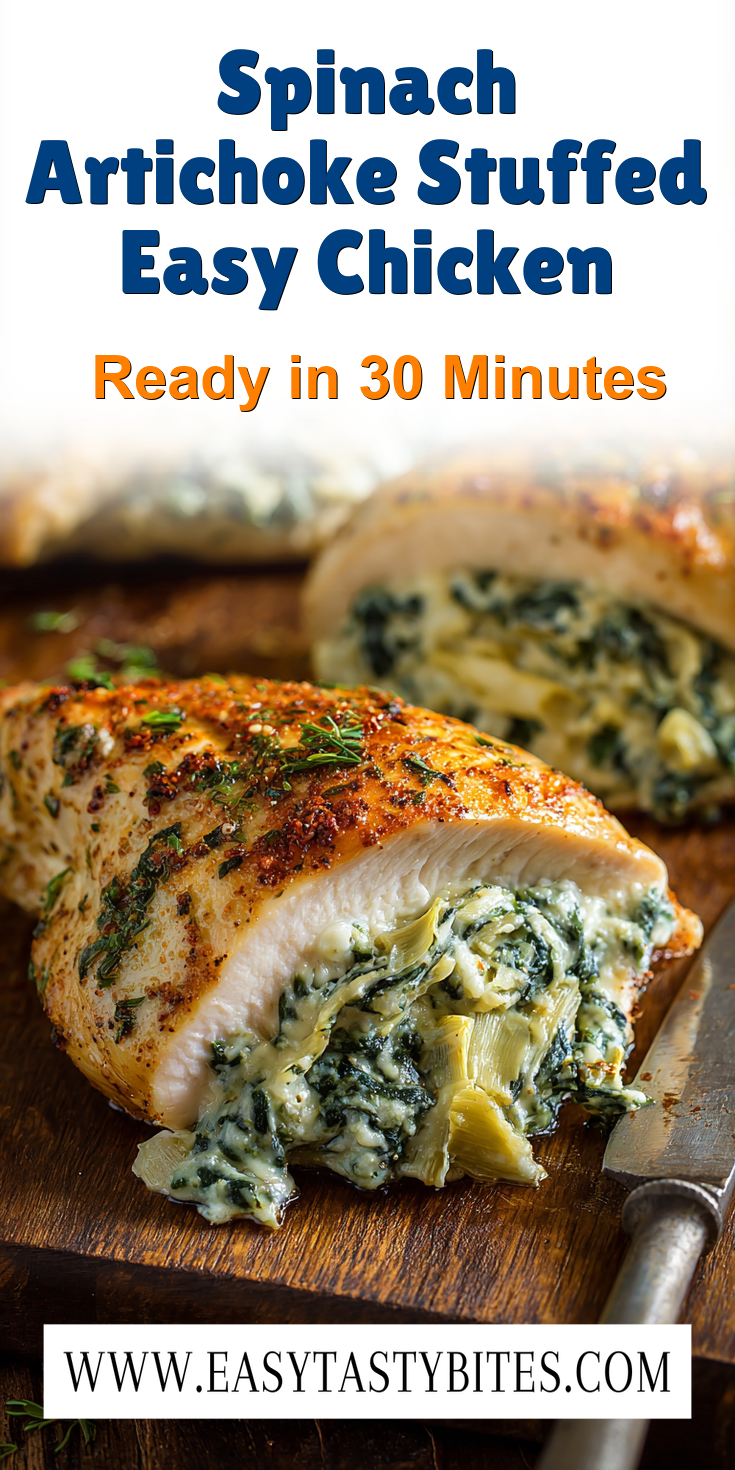
You’ve made spinach artichoke stuffed chicken before. I know you have. It’s a classic for a reason.
But I’m willing to bet it’s never been this good. The secret isn’t in the stuffing. It’s in what you do to the chicken first. If you love the combination of spinach and cheese, you should also try our Gourmet Stuffed Chicken Breasts with Spinach & Cheese.
This Spinach Artichoke Stuffed Easy Chicken is about to become your new weeknight hero. It feels fancy but comes together fast. Let me show you the one move that changes everything.
Recipe Overview
Here’s the quick look at what we’re making today. It’s simpler than you think.
- Cuisine: American
- Category: Main Course
- Prep Time: 15 minutes
- Cook Time: 25 minutes
- Total Time: 40 minutes
- Servings: 4
The Secret Ingredient That Makes All the Difference
I’ve tested this dozens of ways. One thing always wins.
The secret is dry brining your chicken. Forget wet marinades that waterlog the meat. An hour before you cook, generously salt your chicken breasts.
Then just leave them uncovered in the fridge. This pulls moisture to the surface to dissolve the salt. That seasoned moisture then gets reabsorbed deep into the meat.
The result? Chicken that’s seasoned to its core and incredibly juicy. It won’t dry out, even if you accidentally overcook it a little. This step is non-negotiable for pro-level flavor.
Why This Method is Better (My Pro-Tips)
Most recipes have you pound the chicken thin, stuff it, and roll it. That’s fine, but it’s messy and the filling can leak.
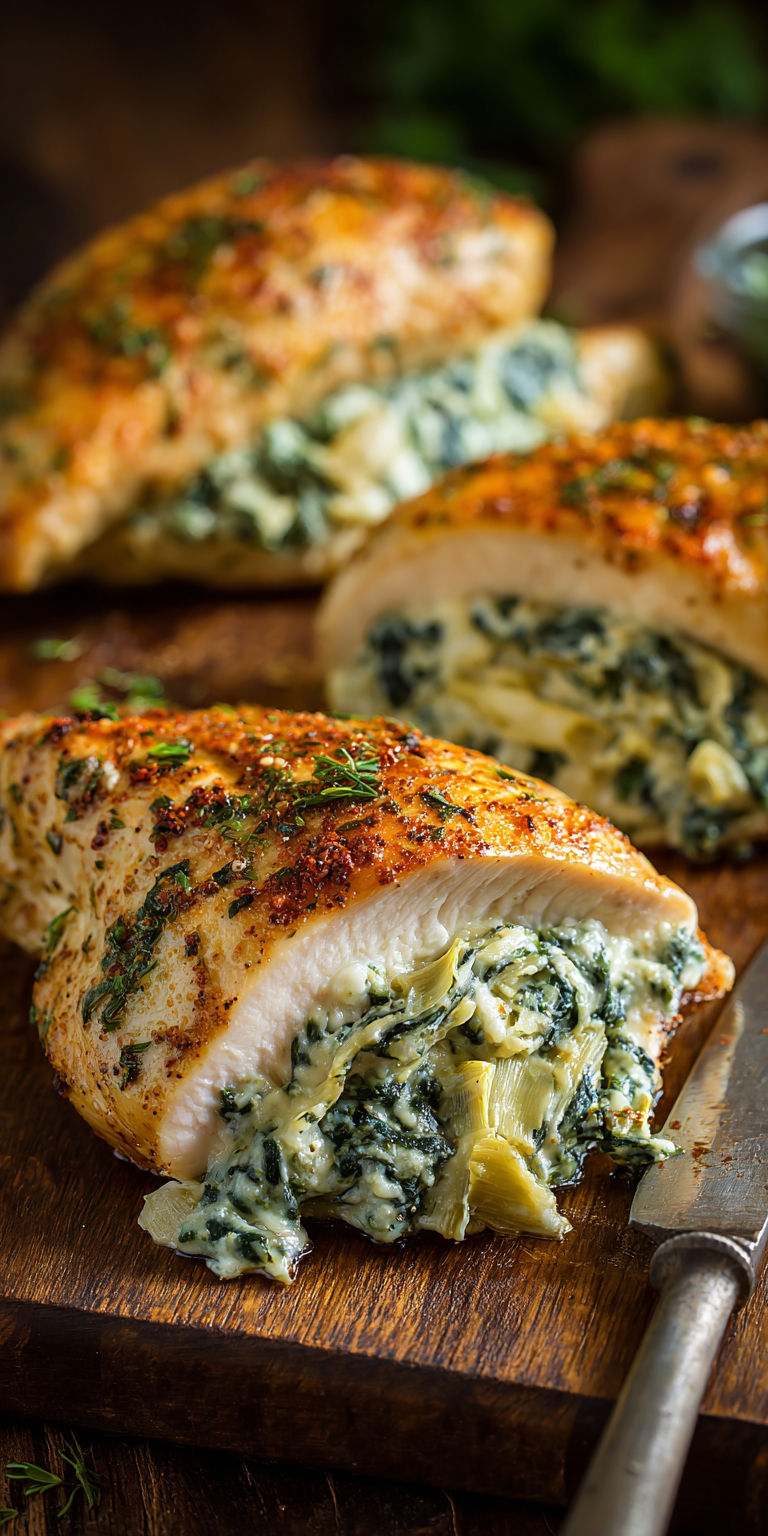
My method is cleaner and gives you more stuffing in every bite. Instead of pounding, you’ll make a simple pocket. Use a small, sharp paring knife and cut horizontally into the thickest part of the stuffed breast. For another fantastic take on this technique, check out our classic Spinach-Stuffed Chicken Breasts recipe.
Spinach Artichoke Stuffed Easy Chicken Recipe

The “Upgraded” Ingredient List
The Pro-Method (Step-by-Step)
Notes
Enjoy your homemade Spinach Artichoke Stuffed Easy Chicken Recipe!
Nutrition Information
The “Upgraded” Ingredient List
This isn’t just a recipe. It’s a blueprint. Use the best ingredients you can find.
- 4 boneless, skinless chicken breasts (about 6 oz each)
- 1 1/2 tsp kosher salt (for dry brining)
- 1 tbsp olive oil or avocado oil
- 8 oz full-fat cream cheese, softened
- 1 cup (packed) fresh spinach, finely chopped
- 1 (14 oz) can artichoke hearts, drained and chopped
- 1/2 cup grated Parmesan cheese
- 2 cloves garlic, minced
- 1/2 tsp onion powder
- 1/4 tsp black pepper
- 1/4 tsp crushed red pepper flakes (optional)
The Pro-Method (Step-by-Step)
Follow these steps in order. The prep work is what makes it easy.
- Dry Brine: Pat your chicken breasts very dry. Season all over with the kosher salt. Place them on a plate and refrigerate, uncovered, for 1 hour (or up to 24 hours).
- Make the Filling: While the chicken rests, make your spinach dip filling. In a medium bowl, mix the softened cream cheese, chopped spinach, artichokes, Parmesan, garlic, onion powder, pepper, and red pepper flakes until fully combined.
- Create the Pocket: Remove chicken from fridge. Using a paring knife, cut a deep horizontal pocket into the side of each breast. Be careful not to cut through the other side.
- Stuff It: Divide the filling into four parts. Use a spoon to stuff each chicken pocket generously. Press the opening gently to seal.
- Sear and Bake: Preheat your oven to 400°F (200°C). Heat oil in a large, oven-safe skillet over medium-high heat. Searthe chicken for 3-4 minutes per side, until you get a beautiful golden-brown crust.
- Finish Cooking: Transfer the entire skillet to the hot oven. Bake for 15-18 minutes, or until the chicken is cooked through (165°F internal temperature).
- Rest and Serve: Let the chicken rest in the skillet for 5 minutes before serving. This lets the juices settle back into the meat.
Common Mistakes & How to Fix Them
Even pros run into issues. Here’s how to solve them before they start.
Problem 1: The Filling Leaks Out. This usually means your pocket broke open. The fix is a simple toothpick. After stuffing, secure the opening with 1-2 toothpicks. Just remember to take them out before serving!
Problem 2: The Chicken Cooks Unevenly. If your breasts are very uneven in thickness, they won’t cook at the same rate. Before stuffing, place them between plastic wrap and gently pound just the thicker ends to an even 1-inch thickness. This guarantees perfect doneness.
Variations for the Adventurous Cook
Once you master the base, the world is your oyster. Try these pro swaps.
Swap the Parmesan for sharp white cheddar or Gruyère. Add 1/4 cup of crispy, chopped bacon to the filling. For a sun-dried tomato twist, add 2 tablespoons of chopped oil-packed tomatoes.
You can also turn this into a keto friendly casserole. Just cube the raw chicken, mix it with the filling, and bake in a dish until bubbly and cooked through. It’s a fantastic low carb dinner with zero fuss. If you’re craving a different kind of stuffed comfort food, our irresistible Crack Chicken Stuffed Shells are a must-try.
Nutrition Notes
This dish is naturally packed with protein and flavor. Here’s a general breakdown per serving.
- Calories: ~480
- Protein: 42g
- Fat: 30g
- Total Carbohydrates: 8g
- Net Carbs: 5g
- Fiber: 3g
Your Pro-Level Questions Answered
Let’s tackle the questions my cooking students always ask.
Can I make the filling ahead of time?
Absolutely. You can mix the cream cheese filling up to 2 days in advance. Just keep it covered in the fridge. Let it sit at room temperature for 20 minutes before stuffing so it’s easy to work with.
What’s the best pan to use?
A heavy, oven-safe skillet is key. Cast iron is my champion here. It gives you a perfect sear on the stove and transitions smoothly to the oven for even baking. If you don’t have one, any oven-safe stainless steel pan works.
How do I know the chicken is done without cutting it?
You must use a meat thermometer. It’s the only sure way. Insert it into the thickest part of the chicken, avoiding the stuffing. Wait for it to read 165°F. This guarantees safety and perfect juiciness every single time.
A Few Final Secrets
You’re now armed with the knowledge to make this dish legendary. Remember, the dry brine is your foundation. The pocket method is your technique.
Don’t skip the rest time after baking. Those five minutes are when the magic really happens inside the chicken. All the juices redistribute, making each slice unbelievably tender.
This recipe is built for your success. It’s designed to be a reliable, show-stopping meal that fits into a healthy lifestyle. Go make it your own.
I shared my best kitchen secret with you. Now I want to hear from you. Did the dry brine change the game for your chicken? What variation did you try? Tell me all about it in the comments below and leave a rating if you loved it!

 Tired of the 5 PM dinner panic? Grab my new 30-Minute Cookbook!