
Some recipes just feel like a warm hug. For me, this classic Strawberry Rhubarb Pie Lattice Crust is one of them. The moment that sweet berry scent mixed with tart rhubarb hits the air, I’m right back in my grandma’s kitchen. If you love simple, fruity desserts, you might also enjoy our recipe for easy strawberry yogurt bites.
It was the first sign that summer was truly here. She’d pull a pie from the oven, its lattice crust golden and glistening. That first bite, with its perfect balance of sweet and tart, is a memory I can taste.
I want to share that feeling with you. This isn’t a fancy dessert. It’s a timeless comfort food, a celebration of simple, seasonal baking. Let’s make a pie that tells a story.
Recipe Overview
- Cuisine: American
- Category: Dessert
- Prep Time: 45 minutes
- Cook Time: 1 hour
- Total Time: 1 hour 45 minutes (plus cooling)
- Servings: 8
The Story Behind This Classic Recipe
This pie is a piece of history on a plate. Rhubarb was one of the first “fruits” to pop up in spring gardens, long before anything else was ripe.
Our grandmothers, eager for a fresh taste after a long winter, would pair it with the first strawberries or a good scoop of sugar. The lattice crust wasn’t just pretty.
It was practical. It let the thick, jammy filling bubble up and thicken just right. Every slice is a tribute to their resourcefulness and love.
What Makes This the *Traditional* Way
We’re keeping it real here. The magic is in the honest ingredients and a hands-on approach. You won’t find balsamic glaze or thyme here.
Just fruit, sugar, a bit of thickener, and a from-scratch crust. The lattice top is part of the tradition. It allows steam to escape so the filling sets perfectly.
It also gives you those wonderful crispy edges next to the soft fruit. This is how it’s been done for generations, and for good reason. For another classic combination, try our decadent Strawberry Chocolate Cake.
Strawberry Rhubarb Pie Lattice Crust Recipe
The Classic Ingredients (No Fancy Stuff!)
How to Make It Just Like Grandma Did
Notes
Enjoy your homemade Strawberry Rhubarb Pie Lattice Crust Recipe!
Nutrition Information
The Classic Ingredients (No Fancy Stuff!)
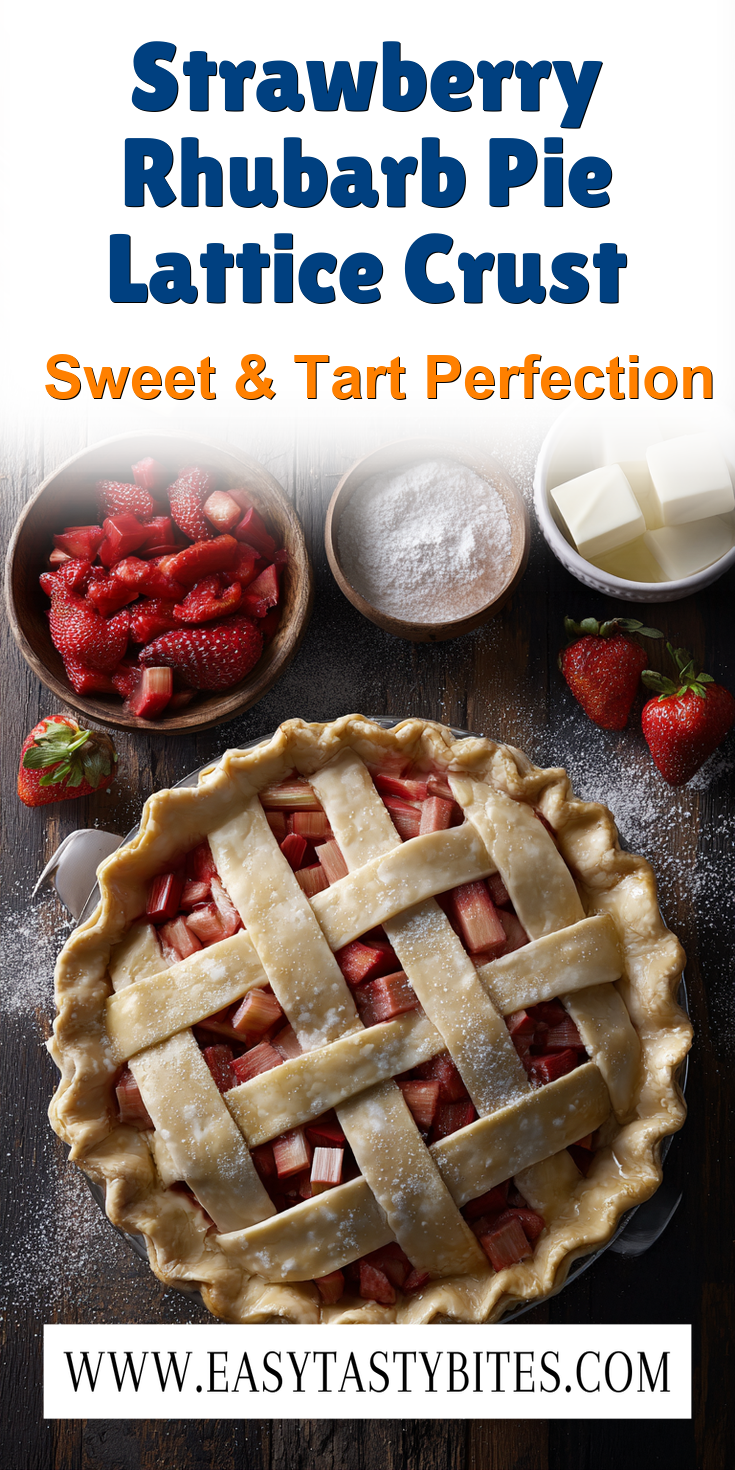
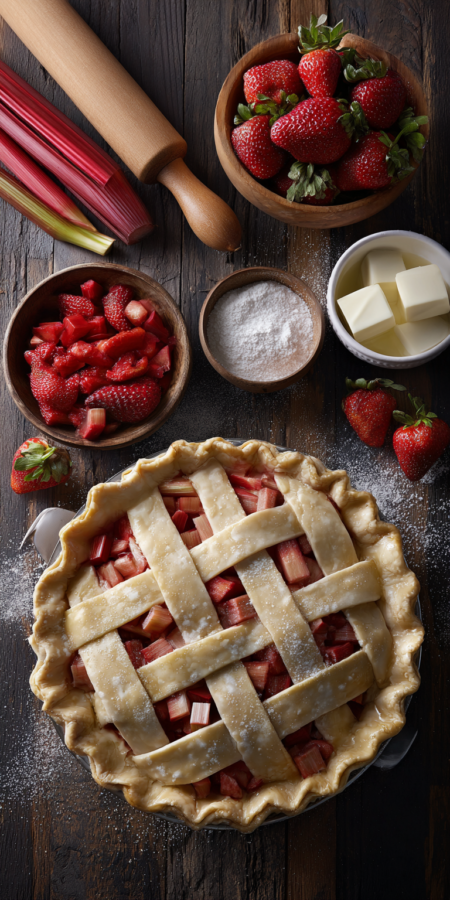
Gathering these simple components is the first step. You likely have most in your pantry already. Quality matters, so use the best berries and freshest rhubarb you can find.
- For the Filling:
- 2 lbs fresh rhubarb, cut into 1/2-inch pieces
- 1 lb fresh strawberries, hulled and halved
- 1 cup granulated sugar
- 1/4 cup cornstarch (the classic thickener)
- 1 teaspoon vanilla extract
- Zest of 1 orange (my grandma’s secret)
- Pinch of salt
- For the Double Crust:
- 2 1/2 cups all-purpose flour
- 1 teaspoon salt
- 1 cup (2 sticks) very cold unsalted butter, cubed
- 6-8 tablespoons ice water
- To Finish:
- 1 egg, beaten with 1 tbsp water (for egg wash)
- 2 tablespoons coarse sugar
How to Make It Just Like Grandma Did
Don’t be intimidated by the lattice. It’s easier than it looks and so rewarding. Just take your time and enjoy the process.
- Make the dough. Whisk flour and salt. Cut in the cold butter until pea-sized pieces form. Drizzle in ice water, 1 tbsp at a time, mixing until the dough just holds together.
- Divide dough in two, flatten into discs, wrap in plastic, and chill for at least 1 hour. This resting time is key for a flaky crust.
- Make the filling. While dough chills, mix rhubarb, strawberries, sugar, cornstarch, vanilla, orange zest, and salt in a large bowl. Let it sit for 20 minutes.
- Roll and fill. On a floured surface, roll one disc into a 12-inch circle. Fit it into a 9-inch pie plate. Trim the edge, leaving a 1-inch overhang. Add the filling.
- Create the lattice. Roll the second disc into a 12-inch circle. Cut into 10-12 even strips. Weave the strips over the filling in a lattice pattern.
- Trim the lattice strips. Fold the bottom crust overhang up and over the strip ends, crimping to seal. Chill the whole pie for 15 minutes.
- Bake. Preheat oven to 400°F. Brush lattice with egg wash and sprinkle with coarse sugar. Bake for 20 minutes, then reduce heat to 350°F.
- Bake for another 40-50 minutes, until the crust is deep golden and filling is bubbling thickly. If the edges brown too fast, cover them with foil.
- Cool completely. This is the hardest part! Let the pie cool on a rack for at least 4 hours. This lets the filling set up perfectly for clean slices.
My Tips for Perfecting This Classic
A few little tricks can make a big difference. They’re the kind of things passed down quietly over a kitchen counter.
Keep everything cold. Your butter, your water, even your bowl. A cold crust means a flaky, tender crust. If the dough gets warm while you work, pop it back in the fridge.
Let the filling bubble. Don’t pull the pie out when you see the first bubble. Wait until the bubbles are thick and slow in the center. That’s how you know the cornstarch has fully done its job.
How to Store and Enjoy Later
This pie is best the day it’s made, but leftovers are a wonderful treat. Cover the cooled pie loosely with foil or plastic wrap at room temperature for up to 2 days.
For longer storage, you can refrigerate it for up to 4 days. I love a cold slice for breakfast. You can also freeze the baked, cooled pie for up to 3 months.
Just thaw it overnight in the fridge. A quick warm-up in a low oven brings back that fresh-baked magic.
Nutrition Notes
- This is a homemade dessert meant to be enjoyed in celebration.
- Values are per serving, assuming 8 slices.
- Calories: ~480
- Total Fat: 22g
- Saturated Fat: 14g
- Sugar: 35g
- Protein: 5g
Your Questions About This Classic Recipe
Here are answers to a couple of common questions I get about this family favorite.
Can I use frozen fruit?
You can, but don’t thaw it first. Toss the frozen rhubarb and strawberries directly with the dry ingredients. You may need to add 5-10 minutes to the bake time. The filling might be a bit juicier, but it will still taste wonderful.
My bottom crust got soggy. What happened?
This is a common worry! Make sure your oven is fully preheated. Baking at the initial high heat helps set the bottom crust fast. Using a glass or ceramic pie dish, which gets hotter than metal, can also help you get a crisp, golden bottom.
What’s the best thickener for fruit pie?
For a classic, clear filling, cornstarch is the winner. It sets up beautifully with these juicy fruits. Tapioca flour is another great traditional option. It gives a slightly glossier, softer set. Both are perfect for this kind of pie.
I hope this recipe finds its way into your own family traditions. There’s something so special about sharing a dessert made with your own hands. If you’re looking for a fun, no-bake treat that combines similar flavors, you must try our Chocolate Strawberry Yogurt Bites: Frozen Berry Bliss Bombs!
It connects us to the past and creates new memories around the table. I’d love to hear about your pie-making adventures. Did your family have a special twist? Please share your stories and photos in the comments below!

 Tired of the 5 PM dinner panic? Grab my new 30-Minute Cookbook!