Let’s be real for a second. How many times have you reached for a snack to quiet the “I’m hungry!” chorus, only to feel that tiny pang of guilt about the sugar rush that’s about to follow? I’ve been there, standing in the pantry aisle, more times than I can count. That’s why I love creating healthier homemade snacks, like these gummy bears or some crispy sugar-free air fryer cinnamon banana chips.
When my kids got hooked on those colorful, chewy little bears, I knew I had to find a better way. That’s when our kitchen experiments with homemade Sugar Free Gummy Bears began. And friends, it was a game-changer.
This isn’t about taking away treats. It’s about making a fun, chewy candy you can feel good about handing over. The best part? They’re incredibly simple to make, and the pride on your kid’s face when they help create their own snack? Priceless.
Recipe Overview
- Cuisine: Homemade Treat
- Category: Snack / Candy
- Prep Time: 10 minutes
- Cook Time: 5 minutes
- Total Time: 15 minutes (plus 1 hour to set)
- Servings: Makes about 100 small gummy bears
Why Even My Picky Eaters Love This!
My kids are the first to turn up their noses at anything “weird” or healthy-looking. But these? They see them as pure magic.
They get to pick their favorite colors and flavors from the juice we use. The texture is perfectly wiggly and fun, just like the store-bought kind they love. But I love that I control what goes in. No mystery ingredients, no sugar crash, just real fruit juice and a little kitchen science.
Our Family-Friendly Ingredient List
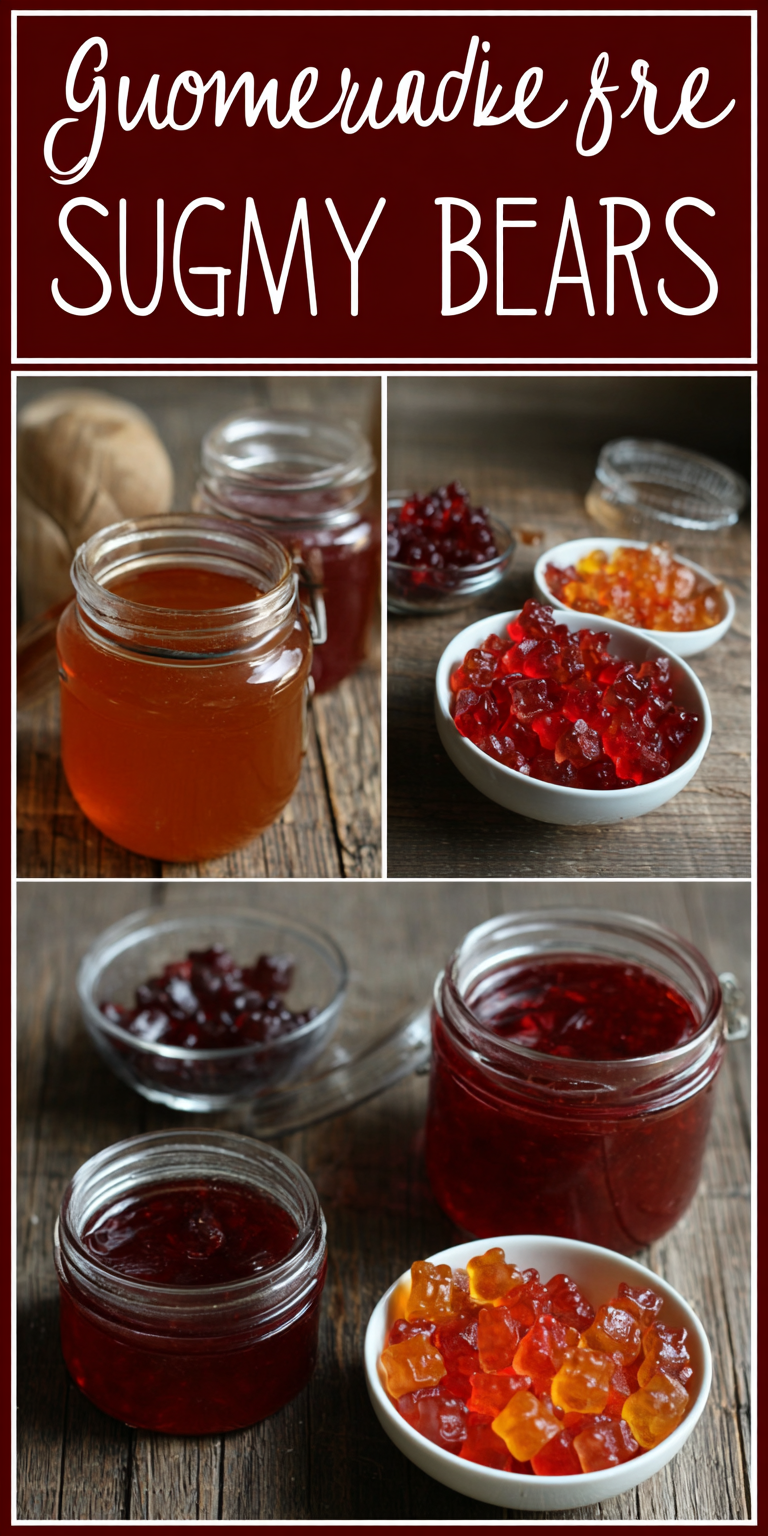
This is where you can breathe a sigh of relief. You probably have most of this already. The star here is gelatin powder. It’s what gives our gummy candy that perfect, satisfying chew.
- 1 cup 100% fruit juice (like apple, orange, or berry blend)
- 4 tablespoons (about 4 packets) unflavored gelatin powder
- 2-3 tablespoons honey or pure maple syrup (optional, for a touch of sweetness)*
- 1-2 teaspoons lemon juice (brightens the flavor!)
*Using a little natural sweetener is totally your call. Since the fruit juice has its own sweetness, you can often skip it! For another snack that uses natural sweetness in a clever way, check out our recipe for sugar-free cinnamon air fryer banana chips.
How to Get the Kids Involved in Cooking This
This recipe is a fantastic first cooking project. My youngest loves being the “Official Juice Pourer.”
For little hands: Let them squeeze the lemon juice or carefully pour the pre-measured fruit juice into the pot. For bigger kids: They can be in charge of whisking the gelatin—it’s a fun job to see it dissolve and transform!
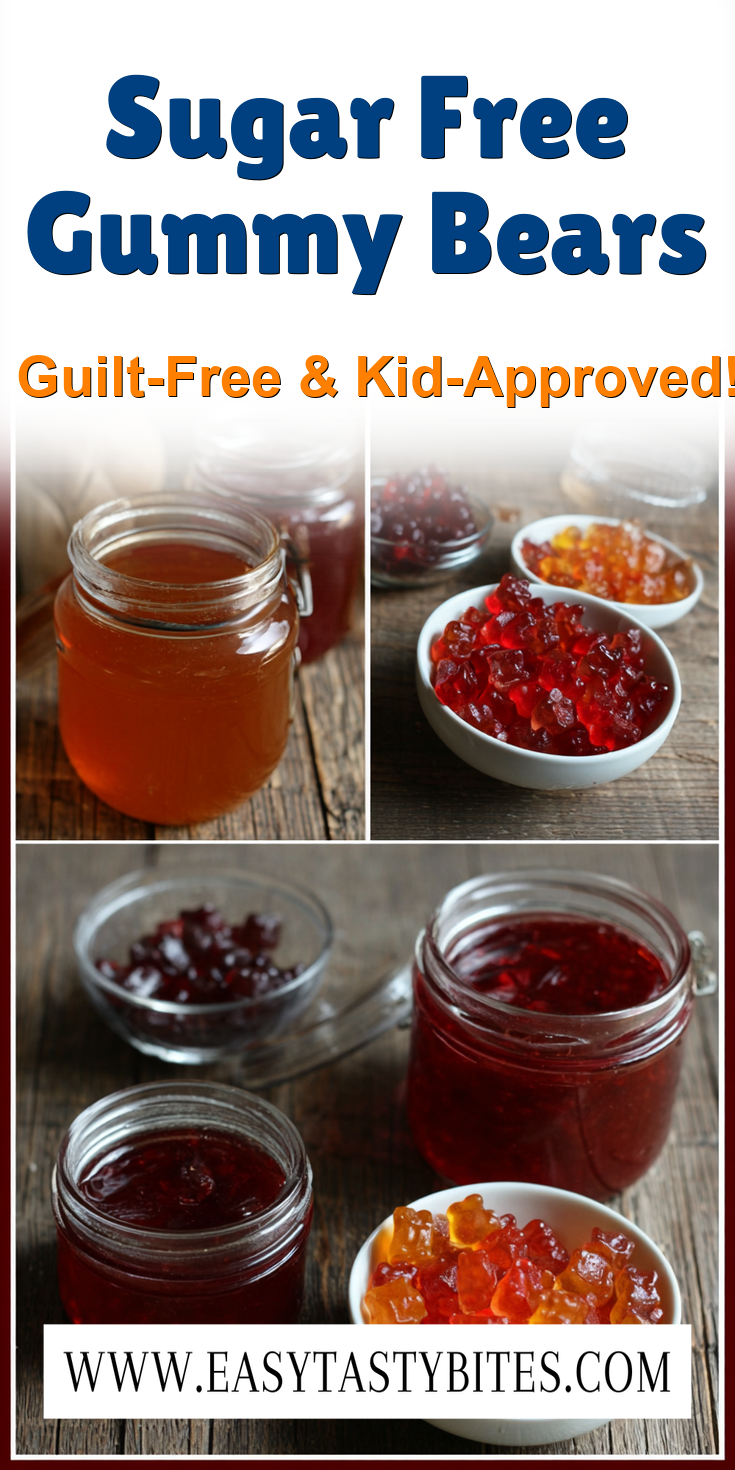
Sugar Free Gummy Bears Recipe
Our Family-Friendly Ingredient List
The Full Step-by-Step Instructions
Notes
Enjoy your homemade Sugar Free Gummy Bears Recipe!
Nutrition Information
The Full Step-by-Step Instructions
Don’t let the idea of making candy scare you. If you can make Jell-O, you can make these. I promise.
- Grab your gummy bear molds (silicone ones are easiest) and place them on a baking sheet for easy moving. Give them a very light spray with cooking oil.
- Pour 1/2 cup of the fruit juice into a small saucepan. Sprinkle the gelatin powder evenly over the top. Let it sit for 5 minutes to “bloom.” It will look wrinkly and thick—that’s perfect!
- Place the saucepan over low heat. Gently warm the mixture, whisking constantly, for 2-3 minutes. You want the gelatin to fully dissolve and the liquid to become smooth. Do not let it boil.
- Remove the pan from the heat. Whisk in the remaining 1/2 cup of juice, the lemon juice, and your optional sweetener if using.
- Carefully pour the liquid into a measuring cup with a spout. This makes the next step so much easier and less messy.
- Slowly pour the mixture into each cavity of your molds. Try to fill them just to the top.
- Very carefully transfer the baking sheet with the filled molds to the refrigerator. Let them set for at least 1 hour, or until completely firm.
- Pop the bears out of the molds! They’re ready to eat. Store any leftovers (good luck with that!) in an airtight container in the fridge.
Fun Twists for Different Tastes
This is where you can really make this recipe your own. My kids love having “flavor days.”
For a vitamin boost: Use a green juice or add a splash of liquid vitamin C to the mix. For a creamy version: Replace 1/4 cup of the juice with canned coconut milk. For fun shapes: Don’t have bear molds? Use any silicone mold—hearts, stars, dinosaurs! The shape is half the fun for kid snacks.
Storing & Reheating (Perfect for Busy Nights)
Okay, you don’t reheat gummy bears! But storing them is key.
Keep them in a sealed container in the fridge for up to two weeks. They can get a little sticky at room temperature. For a longer-term stash, you can freeze them on a parchment-lined sheet, then toss them in a bag. They thaw in minutes.
Nutrition Notes
Compared to traditional gummy candy, this homemade swap is a win. Here’s the simple breakdown per serving (about 10 small bears):
- Primarily protein from the gelatin (great for hair, skin, and nails!).
- Natural sugars only from the fruit juice.
- No artificial colors, flavors, or high-fructose corn syrup.
- Gelatin can be good for gut and joint health.
FREQUENTLY ASKED QUESTIONS
Can I use agar-agar instead of gelatin to make these vegan?
You can try! Agar-agar sets differently than gelatin. Use about 2 teaspoons of agar powder. You’ll need to bring the mixture to a gentle boil for it to activate, then let it cool slightly before pouring into molds. The texture will be a bit firmer and less chewy.
My mixture got lumpy! What did I do wrong?
This usually happens if the heat was too high or you didn’t whisk enough while the gelatin dissolved. To fix it, you can try straining the warm mixture through a fine-mesh sieve into your pouring cup to catch any lumps. Next time, keep the heat very low and be patient with your whisking.
Why did my gummies turn out rubbery?
This likely means the mixture reduced too much on the stove, making the gelatin concentration too high. Remember, low heat and just enough time to dissolve is the trick. Using the full cup of liquid is important for that perfect, soft chew.
So there you have it. A simple, fun project that turns into a snack you can actually feel good about. It takes the power back from the candy aisle and puts it right in your (and your kids’) hands.
The next time you’re facing the after-school snack dilemma, I hope you give these a try. Watching your kids enjoy a treat they helped make, without the sugar rollercoaster, is one of the best feelings. And if you’re looking for a savory main dish to balance out all the sweet snacks, our brown sugar & mustard glazed corned beef is a fantastic family meal.
I’d love to know if this was a hit with your family! What juice flavors did you try? Please leave a comment and rating below!